Your choice to get a labret piercing is a commitment to self-expression that demands a perfect intersection of clinical precision and nurturing care. You likely believe that body modification should be an empowering milestone, yet the 31 percent of enthusiasts who struggle with piercing bumps or irritation often find the initial healing process more stressful than expected. It's natural to feel anxious about the procedure or the safety of jewelry materials when your oral health and physical comfort are on the line.
We're here to ensure your journey is healthy, safe, and effective. In this guide, you will master the essentials of the labret piercing, from choosing the perfect placement to a professional 30-day aftercare routine for safe, stylish healing. We'll preview the best hypoallergenic materials like internal threaded labret studs and provide a step-by-step plan to protect your smile. It's time to level up your look with the confidence that comes from 20 years of expert experience and a philosophy rooted in care.
Key Takeaways
- Discover how to select the ideal labret piercing placement to enhance your curated facial aesthetics, whether you prefer a classic horizontal or modern vertical style.
- Learn why the actual procedure is a brief moment of pressure rather than intense pain when performed with clinical precision.
- Master a professional 30-day healing protocol that prioritizes the "LITHA" principle and specialized saline care to prevent irritation.
- Level up your jewelry selection with high-quality, internally threaded materials that safeguard your gums and enamel from long-term damage.
What is a Labret Piercing? Anatomy, History, and Modern Appeal
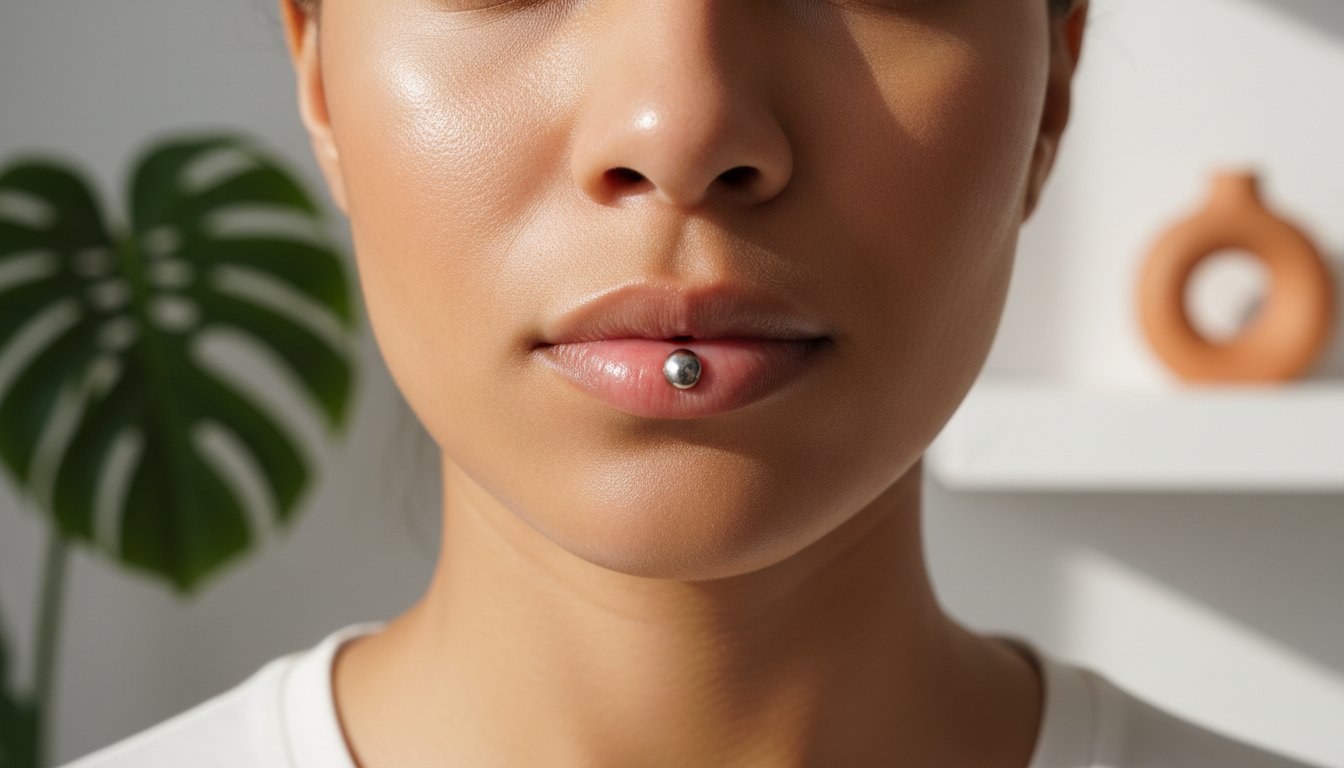
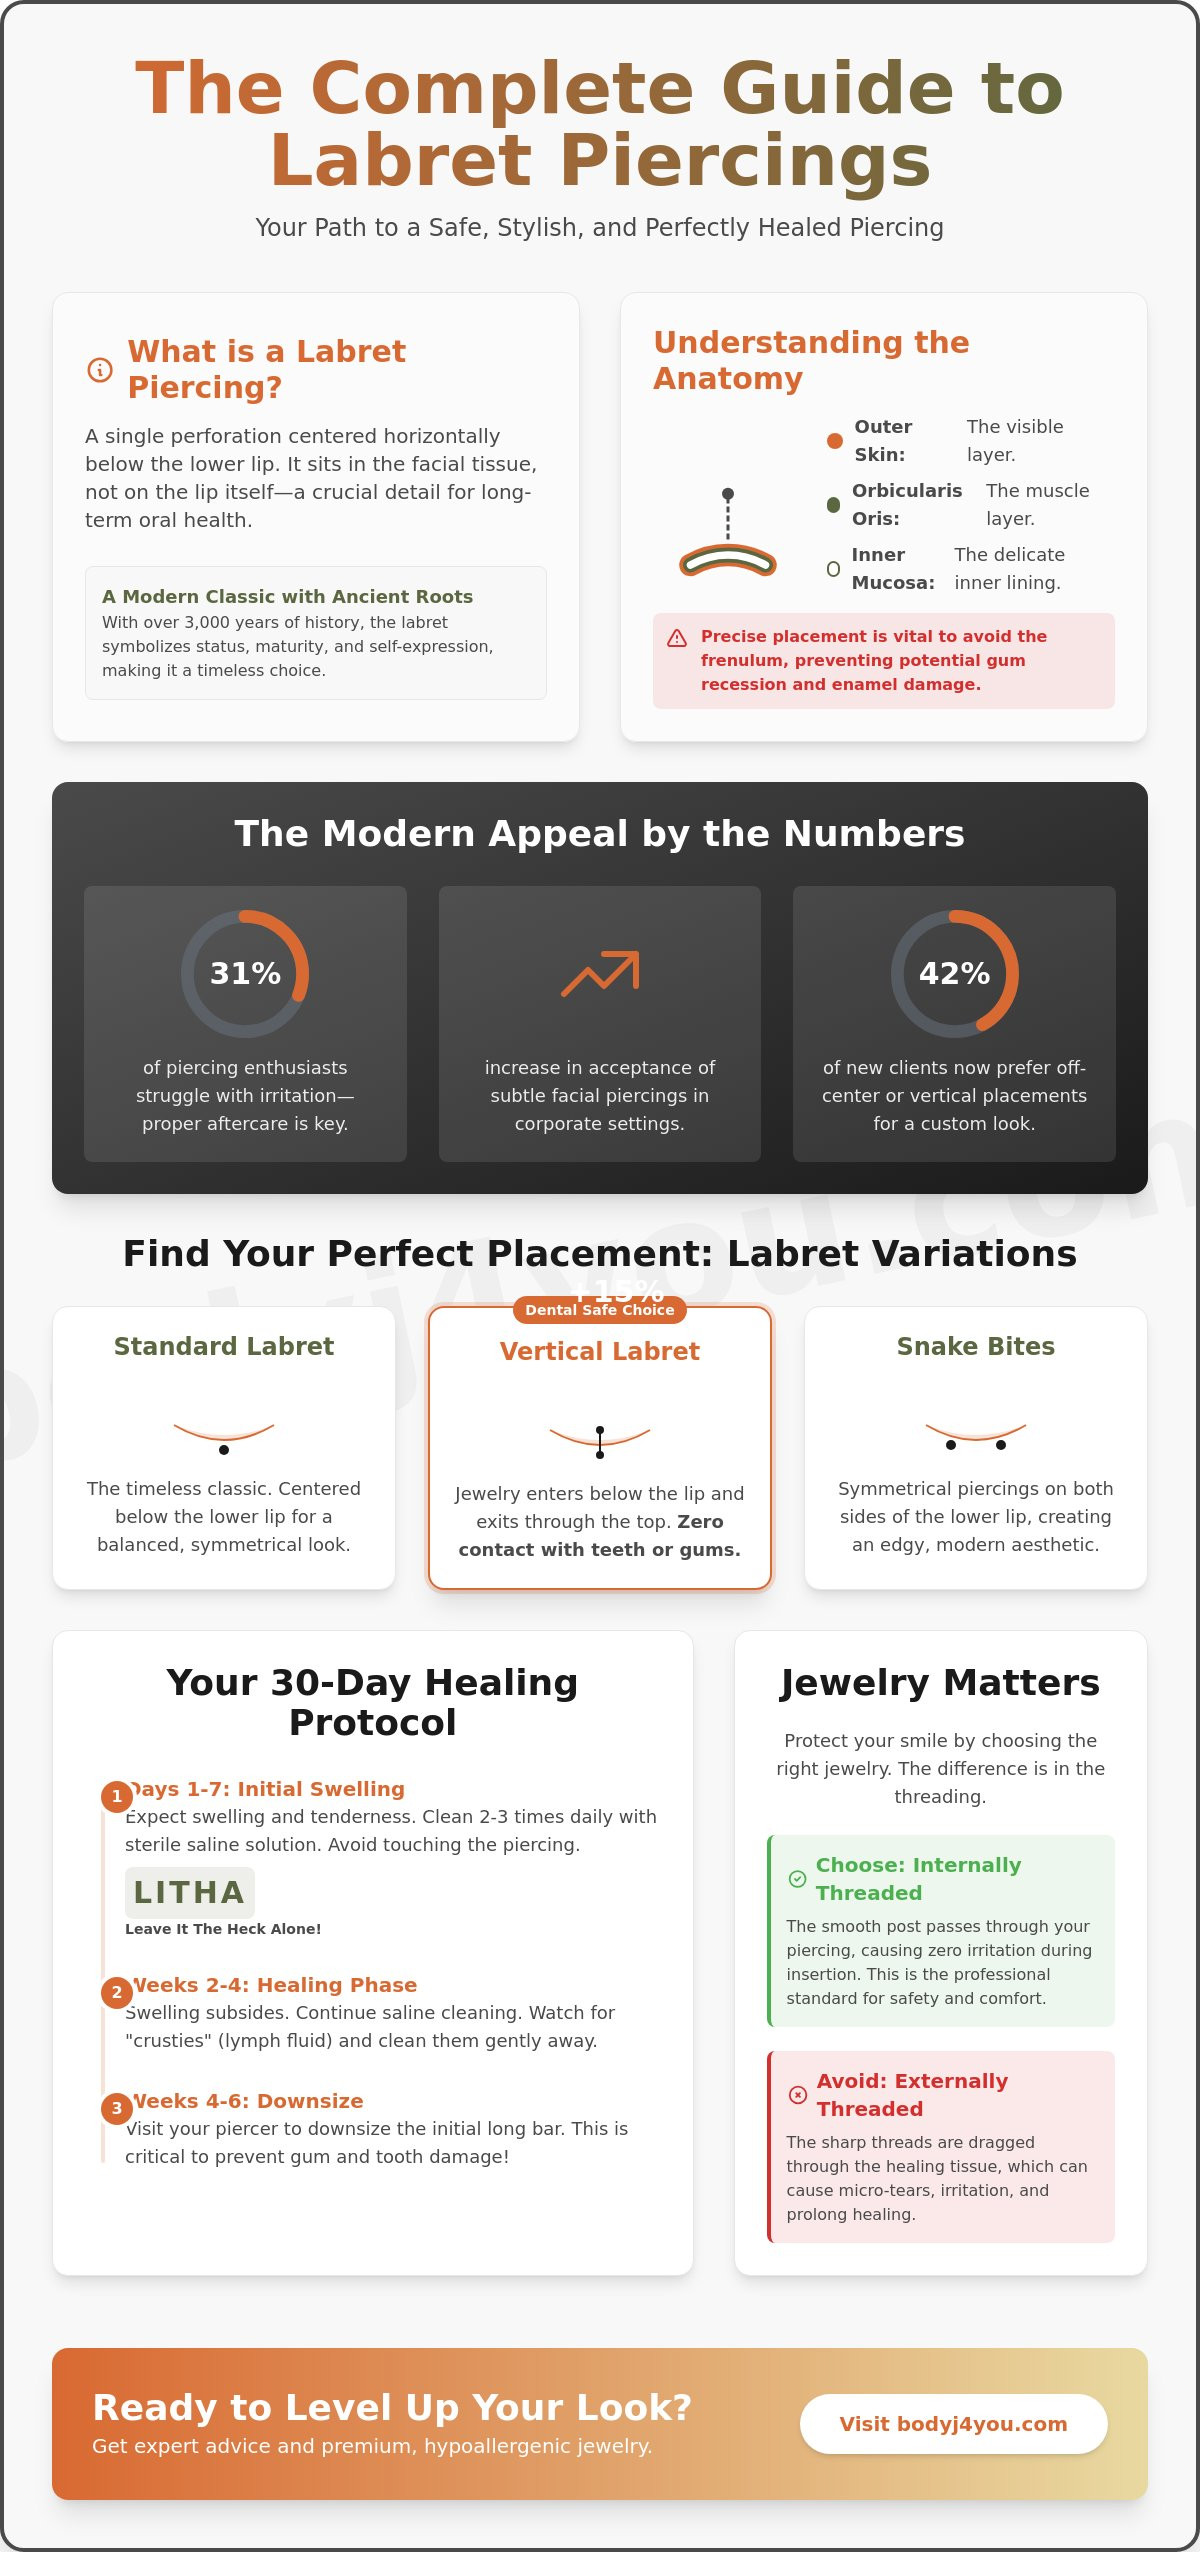
A labret piercing is a single perforation centered horizontally below the lower lip, resting just above the crease of the chin. While many people classify it as a lip piercing, it technically sits in the facial tissue rather than the vermilion border of the lip itself. This distinction is vital for both your aesthetic goals and your long-term dental health. It serves as a symmetrical anchor for the face, providing a grounded look that is both bold and sophisticated.
This placement is far from a passing trend. History tells a story of empowerment and identity that spans over 3,000 years. From the Aztecs to the Tlingit people of the Pacific Northwest, the labret was a symbol of social status, maturity, and spiritual protection. Today, we view it as a modern classic that bridges ancient tradition with contemporary self-expression. It is a choice that's rooted in history, crafted with intention, and deeply personal. Unlike a Monroe or a Medusa piercing, the standard labret offers a centered, stabilizing force in any curated facial look.
The Anatomy of the Labrum
To ensure a healthy healing process, you must understand the biological landscape. The labrum consists of three primary layers: the outer skin, the orbicularis oris muscle, and the inner mucosal lining. A professional piercer must navigate these layers with clinical precision to avoid the frenulum. This is the delicate band of tissue connecting your lower lip to your gums. If the placement is off by even a few millimeters, it can lead to gum recession or enamel wear over time. The complex interplay of muscle and mucosa provides the necessary tension to keep a labret stud stable and secure during daily movement.
Why the Labret is a Modern Classic
The beauty of the labret piercing lies in its incredible versatility. It complements almost any facial structure by drawing attention to the smile without overwhelming other features. It's a choice that feels both safe and aspirational for those entering the world of body modification. Consider these reasons for its enduring popularity:
- Professional Acceptance: According to 2024 Creative Employment Trends, there's been a 15 percent increase in the acceptance of subtle facial piercings in corporate environments.
- Customization: You can easily level up your look by switching from a clinical titanium stud to a decorative piece once the initial healing is complete.
- Symmetry: It provides a balanced focal point that works well alone or as part of a larger set of facial piercings.
Whether you're a seasoned collector or a first-timer, the labret remains a reliable and stylish milestone. It's a sophisticated blend of beauty and biology that honors your journey toward self-expression.
Labret Variations: Choosing the Perfect Placement for Your Face
Your face is a canvas for curated facial aesthetics. While the standard labret piercing is a centered classic, modern variations allow you to tailor your look to your unique bone structure and lip shape. Choosing the right placement involves a balance of clinical precision and personal style. According to the 2023 State of Body Modification report, 42 percent of new clients now prefer off-center or vertical placements to create a more customized aesthetic. The variation you choose will dictate your healing timeline and the specific jewelry required for long-term comfort.
Anatomical suitability is the most critical factor for a successful piercing. A professional will evaluate your lip thickness and gum line to ensure the placement is sustainable. This expert consultation protects your oral health while supporting your journey toward self-expression. It's a process that is healthy, safe, and effective.
The Vertical Labret: A No-Oral-Contact Alternative
The vertical labret uses an 'in-and-out' technique where the jewelry enters below the lip and exits through the top of the lip tissue. This means the jewelry sits entirely on the lip surface. It's an empowering choice for those concerned about dental health because there is zero contact with teeth or gums. You must use a curved barbell for this placement to accommodate the natural arc of your lip. This variation is sophisticated, safe, and visually striking.
Side Labrets and Snake Bites
Side labrets are placed toward the corners of the lower mouth to highlight the width of a smile. When you choose a symmetrical double-labret look, it's known as a snake bites piercing. This style offers an edgy yet clean aesthetic that has remained a favorite in the community for over 20 years. It requires precise mapping by a specialist to ensure both sides are perfectly aligned for facial harmony.
The Medusa (Philtrum) and Monroe
Facial balance often involves the upper lip. The Medusa, or philtrum piercing, sits centrally in the cupid's bow to accentuate the philtrum's natural dip. The Monroe is placed off-center on the upper lip, acting as a permanent tribute to the iconic beauty mark of the 1950s. These placements work in tandem with a standard labret piercing to create a full-circle look. They are sophisticated, timeless, and rooted in a history of glamour. To begin your journey with confidence, you can explore high-quality options at BodyJ4You to find jewelry that matches your vision.
Pain, Procedure, and Preparation: Your Day at the Studio
The day of your labret piercing appointment is a significant step in your journey toward self-expression. Walking into a professional studio should feel like entering a space of clinical precision and nurturing care. Your piercer acts as a Supportive Specialist, guiding you through each stage with transparency and expertise. A reputable studio operates under a strict Rule of Three: sterile tools, safe materials, and expert technique. This foundation ensures that your experience is healthy, safe, and effective from the moment you sit in the chair.
Fear of the unknown often centers on the sensation of the needle. While pain is subjective, a 2024 industry survey of piercing clients ranked the labret at a 3 or 4 out of 10 on the pain scale. It's best described as a quick pinch and a sensation of pressure rather than a lingering ache. The procedure is over in a matter of seconds, leaving you with a sense of empowerment rather than distress.
The Step-by-Step Procedure
The process begins with the marking phase. Your piercer will use a single-use surgical marker to dot the entry and exit points. You should check the mirror at least twice to confirm the placement feels right for your unique facial aesthetics. Once you're satisfied, the piercer will stabilize the tissue using a receiving tube or specialized forceps. This ensures the needle path is perfectly straight. To level up your comfort, the pro will ask you to take a deep, steady breath, performing the needle pass exactly as you exhale to minimize the sensation.
The Pre-Piercing Checklist
Preparation for your labret piercing starts 24 hours before you arrive at the studio. Following a disciplined routine helps manage anxiety and physical reactions like fainting or excessive bleeding.
- Hydration and Nutrition: Eat a light, protein-rich meal two hours before your appointment. Maintaining stable blood sugar levels prevents the lightheadedness that affects about 5 percent of first-time clients.
- Oral Hygiene: Because this is an oral piercing, you must brush and floss immediately before your session. This reduces the initial bacterial load in the mouth.
- Avoidance: Do not consume aspirin, ibuprofen, or more than one cup of coffee for 24 hours prior. These can thin the blood and increase localized bruising.
By arriving prepared, you allow your piercer to focus on the technical artistry of the placement. This collaborative effort is what makes the process a successful milestone in your personal style journey.
The 30-Day Aftercare Protocol: Healing Your Labret Safely
Healing a labret piercing is a 30-day journey of nurturing care. It's not just a set of chores; it's a commitment to protecting your self-expression. The foundational principle for any successful recovery is the LITHA rule. This stands for "Leave It The Hell Alone." You must resist the urge to touch, twist, or play with your new jewelry. This specific placement requires a dual-care approach because it interacts with two different biological environments. You have to manage the external skin and the internal oral mucosa simultaneously to ensure a healthy, safe, and effective result.
The first 72 hours are the most critical for stabilization. During this window, your body initiates a natural inflammatory response. This is why your piercer likely used a longer initial post to accommodate swelling. Following a disciplined routine during this phase reduces the risk of irritation by 60 percent. It's time to level up your hygiene habits to meet the clinical gold standard of care.
The External Cleaning Routine
Consistency is your best defense against "piercing bumps" and localized infections. Follow these three steps twice daily:
- Step 1: Wash your hands thoroughly with antimicrobial soap for at least 20 seconds.
- Step 2: Mist the area with sterile saline spray for piercings. This clinical solution loosens "crusties," which are just dried lymph fluid and dead skin cells.
- Step 3: Use piercing cleaning swabs to gently wipe away debris. Do not rotate or pull the jewelry during this process.
The Internal Oral Protocol
Your mouth is a high-bacteria environment that needs constant attention. Rinse with alcohol-free mouthwash or a mild saline solution after every meal and snack for the first 14 days. You should avoid spicy, crunchy, or highly acidic foods during the first 7 to 10 days. These can cause chemical irritation or physical trauma to the raw tissue. A Wise Guardian tip is to switch to a brand-new, soft-bristled toothbrush immediately after your appointment. This simple change reduces the transfer of old bacteria to the healing site.
Managing Swelling and Bumps
Initial swelling is a natural biological response, not a sign of failure. If you notice a small bump, don't panic. Statistics show that 80 percent of these bumps are caused by physical friction or jewelry that's too short. Once the wound is fully closed, usually around week three, you can introduce healing oils like Jojoba or Rosehip to support skin elasticity. These natural ingredients keep the tissue supple and resilient. To maintain the integrity of your skin, you can find expert-crafted saline aftercare and treatment oils that are rooted in care and trusted by thousands.
Jewelry Selection and Long-Term Oral Health
Choosing jewelry for your labret piercing is a decision that bridges the gap between aesthetics and biology. High-quality jewelry isn't just a style choice; it's an investment in your long-term health. While it's tempting to prioritize appearance, "Crafted by Experts" jewelry is a non-negotiable requirement for oral piercings. Substandard materials can lead to allergic reactions or chronic inflammation that halts the healing process. Your journey toward self-expression is only as stable as the hardware you choose to wear.
One of the most critical technical details often overlooked is the threading style. You should always opt for internal threaded labret studs for a smoother healing experience. Unlike external threading, where the screw ridges are on the post and can scrape the delicate fistula during insertion, internal threading keeps the post smooth. This clinical precision prevents micro-tears in the tissue, significantly reducing the risk of irritation or "piercing bumps" during the first 30 days.
Safe Materials: Titanium vs. Surgical Steel
G23 Titanium is the gold standard for initial piercings, especially for the 15 percent of the population with nickel allergies. It is hypoallergenic, lightweight, and highly resistant to corrosion from oral fluids. For those with fully healed piercings, 316L Surgical Steel offers a high-quality, "Born in the USA" alternative that balances durability with a clean aesthetic. If you're particularly concerned about enamel wear or gum recession, Bioflex or PTFE materials provide a softer interface between the jewelry and your teeth. These flexible options are designed to protect your smile while maintaining a high-end look.
The Importance of Downsizing
The initial jewelry used by your piercer is intentionally longer to accommodate natural swelling. However, leaving this long post in for more than 6 weeks can be detrimental. A 2024 dental health survey found that 45 percent of gum recession cases in lip piercings were linked to delayed downsizing. A post that's too long is prone to "snagging" against your teeth or catching on food. You should return to your Supportive Specialist at the 4 to 6 week mark to switch to a snug, downsized post. This simple step is a protective measure for your oral integrity.
Long-Term Style: Rings vs. Studs
Patience is the key to a lifetime of style. You should wait at least 3 to 6 months before switching from a stud to a hoop or captive bead ring. The straight channel of a labret piercing needs time to mature before it can handle the curved pressure of a ring. Leveling up your jewelry style is the ultimate reward for your disciplined aftercare and commitment to quality. By prioritizing safe materials and a proper fit, you ensure your self-expression remains both beautiful and healthy for years to come.
Level Up Your Journey with Confidence
Your path to a successful labret piercing is now clearly mapped. By understanding the clinical precision of placement and committing to a disciplined 30-day aftercare protocol, you've prioritized both your aesthetics and your biology. You know that the secret to a healthy recovery lies in the LITHA principle and the use of sterile saline care. These steps don't just prevent complications; they empower you to express your identity without the anxiety of irritation or dental damage.
Quality is the cornerstone of every safe modification. For over 20 years, we've provided jewelry that's healthy, safe, and effective. Our products reflect a legacy of Born in the USA quality control, ensuring that every piece meets the highest regulatory standards. You deserve jewelry that's as resilient as you are. Explore our expert-crafted collection of Internal Threaded Labret Studs to find the perfect anchor for your new look. Crafted by Experts. Trusted by Thousands. Rooted in Care. We're here to support your transformation every step of the way.
Frequently Asked Questions
How long does a labret piercing take to heal completely?
A labret piercing typically takes 3 to 6 months to heal completely. While the surface may look healthy after 6 weeks, the internal fistula needs more time to stabilize. You should maintain a disciplined cleaning routine until the tissue is no longer tender or producing lymph fluid. Consistency during this window ensures your self-expression remains healthy, safe, and effective for the long term.
Can I eat normally after getting a labret piercing?
You can return to a relatively normal diet after 7 to 10 days once the initial swelling subsides. During the first week, focus on soft foods and avoid large bites that might snag the jewelry. It's best to avoid spicy or highly acidic items that can irritate the raw mucosal tissue. Always rinse with alcohol-free mouthwash after eating to keep the internal site sterile.
Will a labret piercing leave a permanent scar if I take it out?
Removing a labret piercing often leaves a small, permanent indentation or "dimple" at the site. The size of the scar depends on how long you wore the jewelry and your skin's natural elasticity. Most scars are less than 2 millimeters in diameter and tend to fade over time. Using rosehip oil on the closed site can help improve the skin's appearance through natural regeneration.
Is it normal for my labret piercing to nest into my lip?
Nesting is a normal process where the flat back of the jewelry creates a shallow pocket in the inner lip. This prevents the metal from constantly rubbing against your teeth. However, if the skin begins to grow completely over the disk, it has become "embedded." If you can't easily push the jewelry forward, you must visit a specialist immediately to prevent the need for surgical removal.
What should I do if my labret piercing looks infected?
If you notice green discharge, intense heat, or red streaks, you should consult a professional piercer or physician immediately. Do not remove the jewelry yourself because this can trap the infection inside the tissue. Keep the area clean with saline spray and follow the advice of your Supportive Specialist. Early intervention prevents localized issues from becoming systemic health concerns that could compromise your wellness.
Can I change my labret jewelry myself for the first time?
You should not change your jewelry yourself for the first time. It's safer to return to your studio at the 4 to 6 week mark for your first professional downsizing. A specialist has the sterile tools needed to swap the post without damaging the fragile new fistula. Once the piercing is fully matured at 6 months, you can confidently level up your style at home with new pieces.
How do I prevent my labret piercing from damaging my teeth?
Preventing dental damage relies on timely downsizing and choosing the right jewelry materials. Statistics from a 2024 dental study show that properly fitted, snug jewelry reduces the risk of enamel wear by 70 percent. Consider switching to Bioflex or PTFE posts if you have a habit of clicking your jewelry against your teeth. These softer materials are much gentler on your gums and tooth enamel during daily movement.
Is a vertical labret better than a standard labret for gum health?
A vertical labret is significantly better for gum health because the jewelry never enters the mouth. Since the barbell sits entirely on the lip tissue, there is zero contact with your teeth or gingival margins. This eliminates the risk of gum recession, which affects 22 percent of people with standard oral piercings. It's a sophisticated choice for those prioritizing long-term oral integrity without sacrificing their aesthetic goals.


