

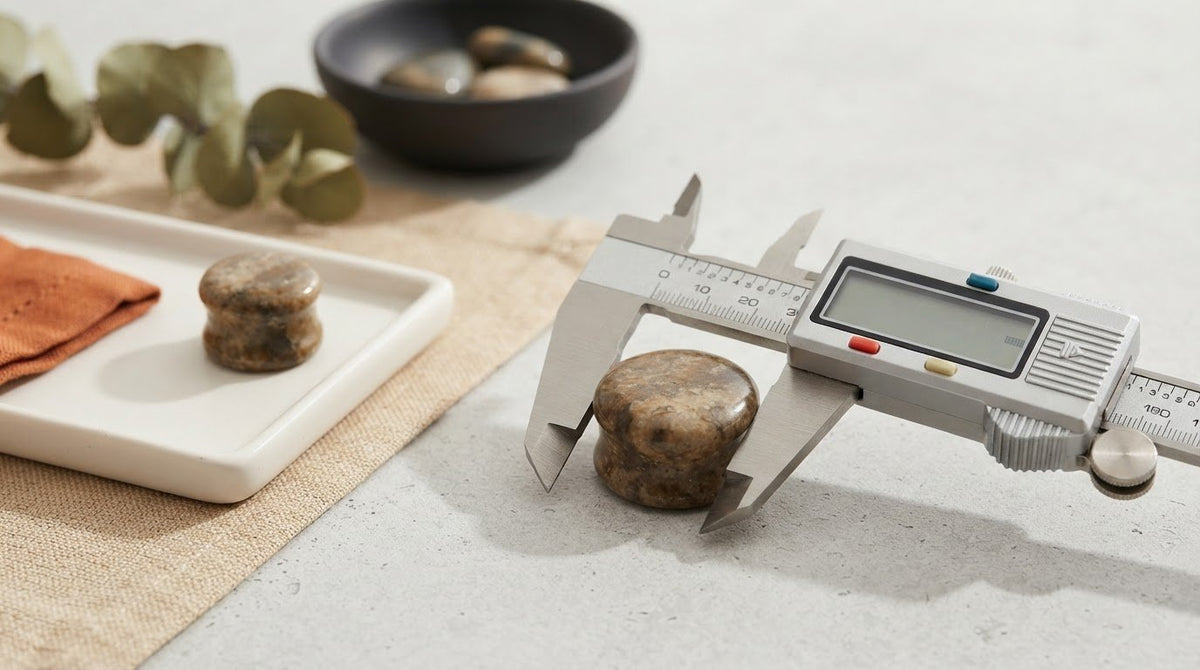
You finally found the perfect pair of stone plugs, but as you try to insert them, you realize the 00g on the label doesn't match the reality of your ear. It's incredibly frustrating to invest in high-end jewelry only to face a fit that feels tight, painful, or completely impossible. We believe that your journey toward self-expression should be defined by beauty, safety, and clinical precision. You deserve to protect your skin, avoid the trauma of a blowout, and ensure your jewelry sits perfectly every single time.
Learning how to measure your gauge size is the most essential skill for any piercing enthusiast. This guide provides a sophisticated, professional approach to measuring your body jewelry with expert accuracy. We will demystify the confusion between gauge and millimeter units, explain the critical difference between flares and wearable areas, and show you how to use digital calipers like a specialist. You'll gain the confidence to identify your current size, understand your anatomy, and prepare for a safe transition to your next stretching goal.
Key Takeaways
- Protect your long-term piercing health by discovering how a tiny 0.5mm discrepancy can cause micro-tears or painful blowouts.
- Master how to measure your gauge size with digital calipers to ensure absolute clinical precision before investing in new jewelry.
- Learn to isolate the critical wearable surface from the decorative flares on plugs to guarantee a comfortable, secure fit.
- Understand the "One Millimeter Rule" to safely navigate your stretching journey while prioritizing the biological integrity of your skin.
Why Precise Gauge Measurement Matters for Piercing Health
Precision is the silent guardian of your aesthetic journey. While a millimeter seems negligible in most contexts, it represents a monumental shift for your earlobes. We prioritize safety, longevity, and comfort above all else. Inaccurate sizing isn't just a minor inconvenience; it's a direct threat to the biological integrity of your skin. When you understand the delicate relationship between jewelry and tissue, you move from being a casual wearer to a supportive specialist of your own body.
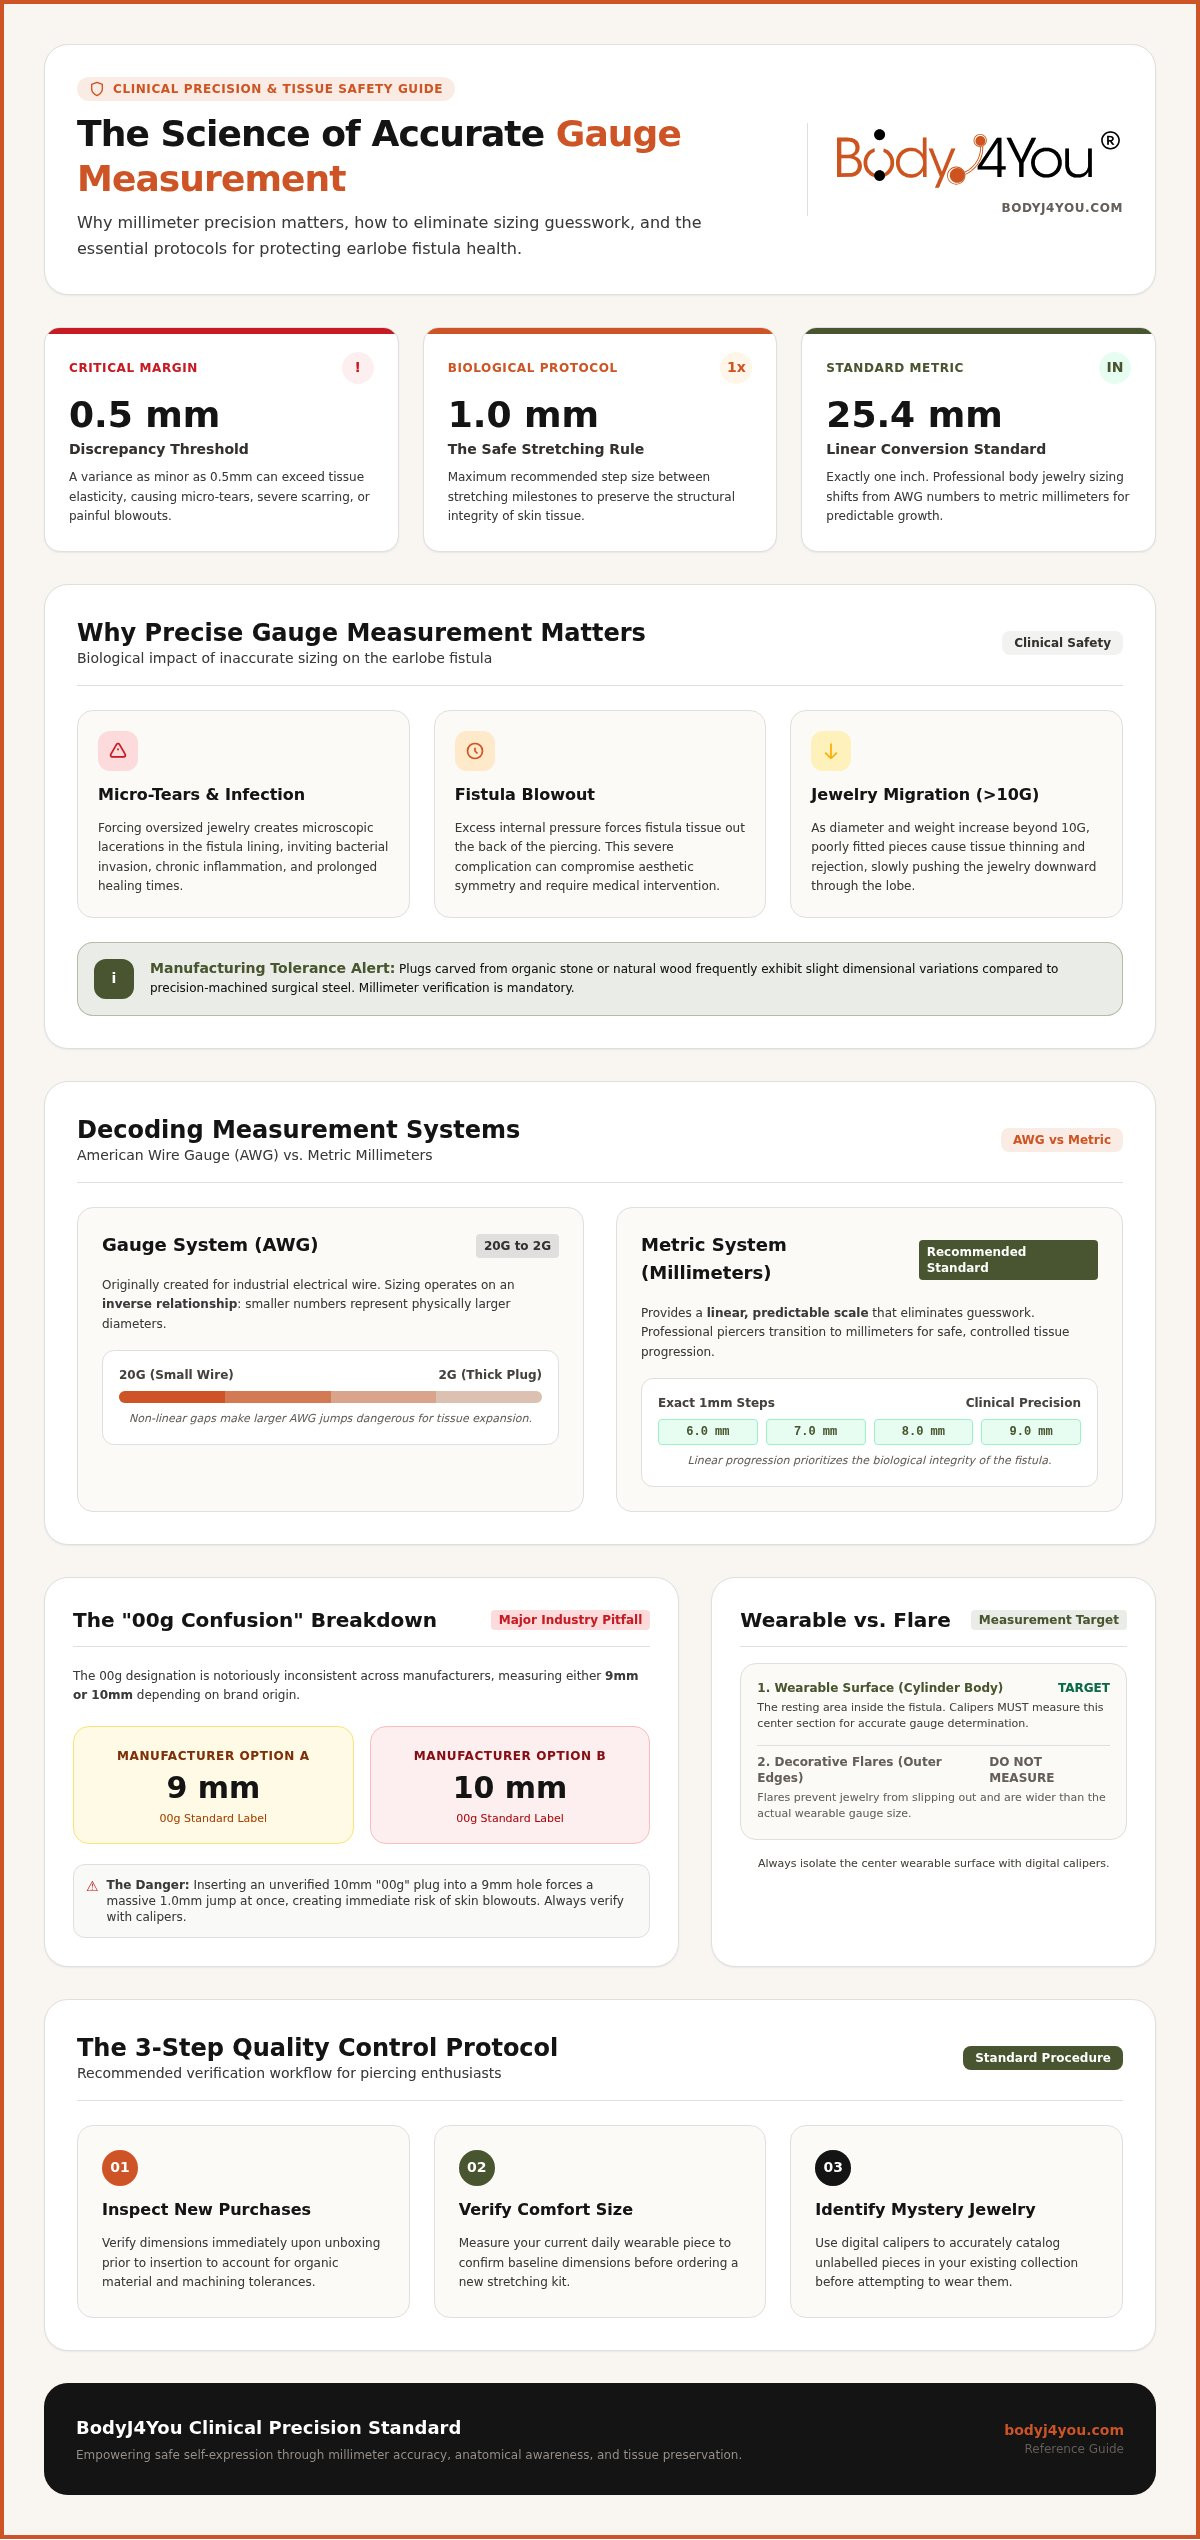
Forcing jewelry that is slightly too large into a fistula causes micro-tears. These tiny lacerations invite bacteria, leading to inflammation, scarring, and prolonged healing times. Even more severe is the "blowout," where the internal fistula tissue is pushed out the back of the piercing. This typically happens when the pressure of incorrectly sized jewelry exceeds the skin's elasticity. A mere 0.5mm difference can be the tipping point between a successful stretch and a traumatic injury. It's the difference between a lobe that thrives and one that requires medical intervention.
Manufacturing tolerances mean that two pieces of jewelry labeled with the same size might actually differ. Plugs carved from organic stone or wood often have slight variations compared to surgical steel. This is why learning how to measure your gauge size with professional tools is non-negotiable for the health-conscious enthusiast. The body jewelry gauge system is historically based on wire thickness; however, the lack of universal standardization across all brands makes precise millimeter verification essential for modern safety standards.
The Dangers of Sizing Guesswork
Relying on the "eye test" is a dangerous gamble, especially once you progress beyond 10G. As jewelry gets larger, the weight and surface area increase the risk of jewelry migration. This occurs when the body rejects a poorly fitted piece, slowly pushing it through the lobe until the skin thins dangerously. Accurate measurement provides the psychological peace of mind you need. It ensures your self-expression remains a source of joy, health, and confidence.
When to Measure Your Jewelry
Quality control starts the moment you receive a package. We recommend a three-step verification process: check new purchases before insertion, verify your current "comfort" size before ordering a stretching kit, and identify any mystery jewelry found in your collection. Consistency is key. By verifying every piece of jewelry against your specific anatomy, you protect your lobes and ensure they remain healthy, elastic, and ready for your next aesthetic milestone.
Decoding the Measurement Systems: Gauge, Millimeter, and Inch
Understanding body jewelry sizing requires a blend of historical context and modern precision. The American Wire Gauge (AWG) system, originally designed for industrial wire, remains the standard for smaller piercings. However, as your stretching journey progresses, the metric system becomes your most reliable ally. Millimeters offer a linear, predictable scale that eliminates the guesswork inherent in traditional gauges. Adhering to APP jewelry standards means prioritizing these precise dimensions to maintain the health of your fistula.
Gauge vs. Millimeter: Which Should You Use?
Gauges function efficiently for initial piercings and small stretches between 20G and 2G. Beyond this point, the mathematical gaps between sizes become inconsistent and potentially dangerous for your skin. The gauge system follows an inverse relationship where smaller numerical values represent larger physical diameters. Because of this lack of linear growth, professional piercers transition to millimeters for larger jewelry to ensure a safe, gradual expansion of the tissue. If you prefer working in inches, the conversion is straightforward; one inch equals exactly 25.4 millimeters.
The 00g Confusion and Beyond
The 00g size is a notorious anomaly in the industry. Depending on the brand, 00g can measure either 9mm or 10mm. This 1mm difference represents a massive jump for a healing lobe. If you accidentally insert a 10mm plug into a 9mm hole, you risk immediate tearing. Knowing how to measure your gauge size with a gauge size chart allows you to verify the exact millimeter diameter before attempting a stretch. Most jewelry above 25mm is sold in fractional increments, such as 1 1/8 inch. While these fractions look clean on a label, always revert to millimeters for the most accurate biological fit.
We list both measurements for every product because we value your safety and your self-expression. Providing both gauge and millimeter data ensures you have the clinical information needed for a perfect fit. It's about empowering your journey with transparency. If you're ready to move up, choosing a high-quality Surgical Steel Taper and Plug Kit ensures you have the exact tools needed for a measured, healthy transition.
Essential Tools for Measuring Your Body Jewelry
Precision is not a luxury. It's a fundamental necessity for maintaining the health of your lobes. While a reference chart provides a theoretical baseline, a physical tool provides the undeniable truth of a piece's dimensions. Digital calipers are the gold standard for anyone serious about their stretching journey. They offer a level of accuracy that a simple visual check can never achieve, providing a digital readout that removes the guesswork from your self-expression.
The ASTM B258 standard establishes the technical specifications for wire diameters, yet manufacturing variations are common in the industry. Even high-quality pieces can fluctuate by a fraction of a millimeter. By learning how to measure your gauge size with professional grade tools, you eliminate the risk of micro tears caused by "close enough" sizing. For smaller items like captive bead rings or labret studs, a specialized jewelry gauge wheel offers a quick, reliable reference for identifying the correct thickness before insertion.
Hygiene is the cornerstone of safe measurement. Before any tool touches your jewelry, it must be thoroughly sanitized. Use a professional cleaning swab or a high-quality saline solution to wipe down the jaws of your calipers. This simple step prevents the transfer of environmental bacteria to your jewelry, upholding the dermatological standards your skin deserves. We treat every measurement as a clinical procedure to ensure your journey remains safe and comfortable.
Choosing the Right Caliper
Digital displays are superior for beginners because they eliminate the human error associated with reading tiny analog lines. Look for a model that features a "zeroing" function and a simple toggle between metric and imperial units. This flexibility is vital when you're cross referencing different measurement systems. When you're measuring delicate materials like acrylic, hold the tool with a gentle, steady grip. Excessive pressure can compress the material or leave unsightly scratches on the polished finish of your favorite plugs.
The Ruler Method (For When You're in a Pinch)
If you don't have access to calipers, a metric ruler can serve as a temporary substitute for larger jewelry. Align the edge of your plug exactly with the zero mark, ensuring you aren't starting from the very end of the ruler itself. A clear plastic ruler is the best choice for this method. It allows you to see the widest part of the jewelry through the material, helping you identify the true diameter more easily. We don't recommend this method for jewelry smaller than 8G (3mm) because the human eye cannot accurately distinguish the tiny fractions of a millimeter required for safe stretching. A ruler measures the straight line diameter, not the total circumference of the piece.
Step-by-Step: How to Measure Different Jewelry Styles
Precision is the Wise Guardian of self-expression. To ensure a safe fit, you must identify the wearable surface. This is the specific portion of the jewelry intended to rest within the tissue of your piercing. Measuring the decorative ends or the outer flares will lead to incorrect sizing, which directly compromises the health and integrity of your skin. Mastering how to measure your gauge size requires a systematic approach to the unique geometry of every piece in your collection.
Measuring Plugs and Tunnels
Plugs and tunnels require the most attention to detail due to the presence of flares. Whether you're working with single or double flare jewelry, the goal is to measure the diameter of the area that actually sits inside the lobe. We recommend a three-step verification process to ensure clinical accuracy.
- Step 1: Locate the 'saddle' or the exact center of the wearable area. For double flare plugs, this is the narrowest point of the jewelry.
- Step 2: Place the jaws of your digital caliper flush against the sides of the wearable surface. Ensure the jaws don't touch the flares, as these are typically 1mm to 2mm larger than the actual gauge.
- Step 3: Rotate the jewelry 90 degrees and take a second measurement. This verifies the piece is perfectly round, which is essential for maintaining even pressure on your fistula.
Measuring Rings and Barbells
When measuring circular jewelry, you must distinguish between the wire thickness and the internal diameter. The wire thickness is the gauge, while the internal diameter determines how much space the ring occupies against your anatomy. For a captive bead ring, focus solely on the thickness of the metal wire. If you're measuring a straight or industrial barbell, the length is measured as the distance between the two threaded ends, excluding the balls themselves.
Irregular shapes like teardrops and triangles present a unique challenge. Since these don't have a single diameter, they're sized based on their total circumference. To find the equivalent gauge, measure the widest point and the height, then consult a specialized conversion chart. This ensures the perimeter of the irregular shape matches the circumference of a round plug, preventing unnecessary tension on the lobe.
Once you've accurately identified your current dimensions, you can safely plan your next transition. We invite you to explore our professional Surgical Steel Taper and Plug Kit to ensure your next stretch is guided by quality and precision.
Transitioning to Your Next Size: Safe Stretching Practices
Patience is the cornerstone of a healthy piercing journey. Mastering how to measure your gauge size allows you to approach your stretching journey with the confidence of a professional. We advocate for the "One Millimeter Rule," a disciplined approach that prohibits skipping sizes to protect the biological integrity of your skin. While the allure of a larger gauge is strong, your tissue requires a steady, methodical pace to prevent scarring, thinning, or blowouts. A safe transition is defined by three pillars: preparation, lubrication, and observation.
Proper lubrication is non-negotiable for a successful stretch. Utilizing natural emollients like jojoba oil or a specialized Gauges balm reduces friction and increases skin elasticity. These products support the skin's natural barrier while you guide new jewelry into place. If you experience persistent throbbing, sharp pain, or bleeding, your piercing is stressed. Stop immediately. Your body is a delicate ecosystem; listen to its signals to ensure long-term health and aesthetic beauty.
Selecting Your Next Kit
Choosing the right tools is a vital step in your self-expression. An Acrylic Ear Stretching Kit offers a lightweight and affordable entry point for those beginning their journey. For those with sensitive skin or advanced stretches, a Surgical Steel Taper and Plug Kit is the preferred choice due to its non-porous, high-end finish. Ensure your chosen collection includes intermediate sizes, such as 7G or 1G. These half-sizes bridge the gap between standard gauges, making the transition smoother and significantly safer for your lobes.
Essential Aftercare Post-Measurement
Once you understand how to measure your gauge size and have successfully inserted new jewelry, the healing phase begins. Hygiene remains your primary defense against irritation. We recommend cleaning both your tools and your new jewelry with Saline Piercing Aftercare Spray before and after use. Following a stretch, adopt the "LITHA" method: Leave It The Hell Alone. Minimal interference allows the fistula to stabilize without unnecessary trauma. If you notice minor redness or localized swelling, a targeted Piercing Bump Treatment Oil can provide the soothing relief your skin needs to recover.
Final Checklist for Success
Before you commit to a new size, perform a final verification to ensure safety and comfort. Double-check your measurements one last time to confirm the jewelry matches your target millimeter diameter. Verify that the material is appropriate for your specific skin sensitivity and current healing stage. Precision, hygiene, and patience are the marks of a true specialist. Ready to size up? Explore our professional-grade stretching kits to find the perfect fit for your next aesthetic milestone.
Elevate Your Self-Expression with Absolute Accuracy
Achieving the perfect aesthetic requires a dedication to biological safety. By mastering how to measure your gauge size, you protect your delicate tissue, eliminate sizing guesswork, and invest confidently in your personal style. True precision bridges the gap between beauty and wellness, ensuring every new piece of jewelry honors your body's unique anatomy and healing capacity.
Trusted by piercing enthusiasts since 2001, BodyJ4You supports your ongoing journey toward refined self-expression. We provide high-quality surgical steel and acrylic options crafted to meet exceptional standards of purity and comfort. Our complete kits deliver everything you need for a seamless transition, including precisely machined tapers, matching plugs, and gentle aftercare. Equip yourself with the knowledge of a specialist and honor your skin with the care it deserves. When you're ready to expand your collection safely, Shop BodyJ4You Professional Stretching Kits to secure a flawless, comfortable fit.
Frequently Asked Questions
Is a 00 gauge 9mm or 10mm?
A 00 gauge plug can be either 9mm or 10mm depending on the manufacturer. This variation represents a significant discrepancy in body jewelry sizing. Because a 1mm difference can cause immediate tissue trauma or tearing in a healed lobe, always use a digital caliper to verify the exact millimeter measurement of your 00g jewelry before attempting insertion.
Can I use a standard tape measure to find my gauge size?
No, you should not use a standard household tape measure. These tools lack the structural rigidity and fine increments required to measure fractions of a millimeter. Attempting to estimate your size with a flexible tape measure can lead to inaccurate readings, causing you to purchase ill-fitting jewelry that risks damaging your piercing.
How do I measure the size of my ear hole if I don't have jewelry in?
The most precise method is to find a known size plug or taper that slides smoothly into the piercing without causing tension. Once you find a piece that fits comfortably, measure that specific item with a digital caliper. This indirect method is the safest way to discover how to measure your gauge size when your lobes are empty.
What is the difference between gauge and diameter in body jewelry?
Gauge refers specifically to the thickness of the jewelry shaft that passes directly through your skin. Diameter represents the distance across the entire circular opening of a ring or the width of a plug. Understanding this distinction ensures you choose pieces that match both your internal piercing size and your anatomical space.
How do I measure a teardrop plug to find its equivalent round size?
Measure the total perimeter of the teardrop shape using a piece of fine string, then measure the length of that string against a metric ruler. Divide that total millimeter circumference by 3.14 to calculate the equivalent round diameter. This formula ensures the perimeter matches a standard round plug, preventing uneven pressure on your tissue.
Should I measure the flare of a plug when determining its size?
No, you must never include the flare when measuring the gauge of a plug. The flare is intentionally designed to be 1mm to 2mm larger than the body of the jewelry to keep it secure. Focus your measurement exclusively on the wearable surface, which is the flat center area that rests inside your ear lobe.
What size is a 'standard' ear piercing in gauges?
A standard initial earlobe piercing is typically performed at 20 gauge or 18 gauge. Piercings completed with a traditional needle are often 16 gauge to provide better stability and a healthier healing path. Knowing this initial baseline helps you plan a safe, structured path if you choose to begin stretching your ears.
How can I tell if my jewelry is externally or internally threaded without a tool?
Examine the exposed post of the jewelry when the decorative end is removed. Externally threaded jewelry features visible ridges on the outside of the post itself, which can scrape the skin during insertion. Internally threaded jewelry has a smooth post with a hollow end, as the threading is hidden inside the shaft for maximum safety.


