

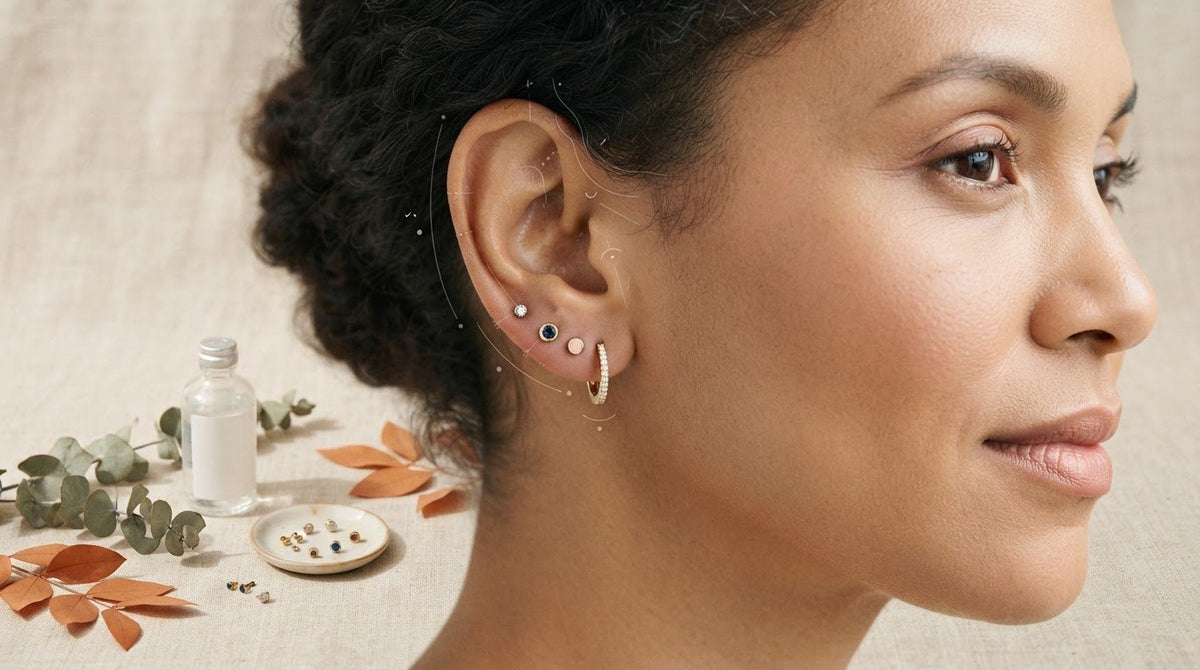
A well-curated ear stack isn't an accident of trends; it's an architectural balance of anatomy, spacing, and jewelry physics. If you want to learn how to stack lobe piercings without overcrowding your ear, the hesitation is completely natural. It's common to worry whether your earlobes have enough surface area for a vertical design, or to fear that an unvetted placement will look crooked, misaligned, and cluttered beside existing holes.
You shouldn't have to gamble when it comes to your body. Piercing curation should celebrate balance, precision, and personal expression. By understanding your unique contours, you can master the art of stacking lobe piercings with expert placement rules, effortless curation formulas, and healthy healing practices that protect your skin from day one.
Ahead, we break down the anatomical blueprints for both horizontal and vertical stacks, practical styling ratios for combining studs with hoops, and the step-by-step aftercare essentials you need to heal multiple piercings comfortably.
Key Takeaways
- Discover how to stack lobe piercings using precise anatomical mapping to determine if your ear suits horizontal curves or vertical sets.
- Master the 4 to 6 millimeter spacing baseline and account for jewelry flare to prevent decorative tops from crowding or rubbing together.
- Apply styling formulas like the Cascading Rule and the Textured Trio to balance studs, hoops, and mixed finishes seamlessly.
- Select protective hardware like internal threaded labret studs that sit flush against the skin, eliminating tissue friction and hair snagging.
- Protect your healing tissue with a hands-off aftercare routine centered on sterile saline sprays to ensure long-term channel health.
What Is a Stacked Lobe Piercing and How Does It Work?
A true stacked arrangement moves far beyond basic ear accessorizing. Unlike a standard row that follows the lower rim, a stacked lobe piercing deliberately utilizes the vertical height and fleshy surface of the lower ear. It positions a secondary puncture directly above, between, or adjacent to an existing channel. This technique gives you the complex, curated depth often associated with cartilage projects, but with the distinct biological advantage of vascular, fast-healing soft tissue.
Mastering how to stack lobe piercings offers an ideal styling canvas for those with expansive, detached, or plush earlobes. If your tissue has ample surface area, stacking lets you display multi-dimensional arrangements without crowding your ear rim. It turns open real estate into intentional art.
Vertical Stacking vs. Horizontal Multi-Lobe Placement
Distinguishing between different lobe geometries is essential before booking an appointment:
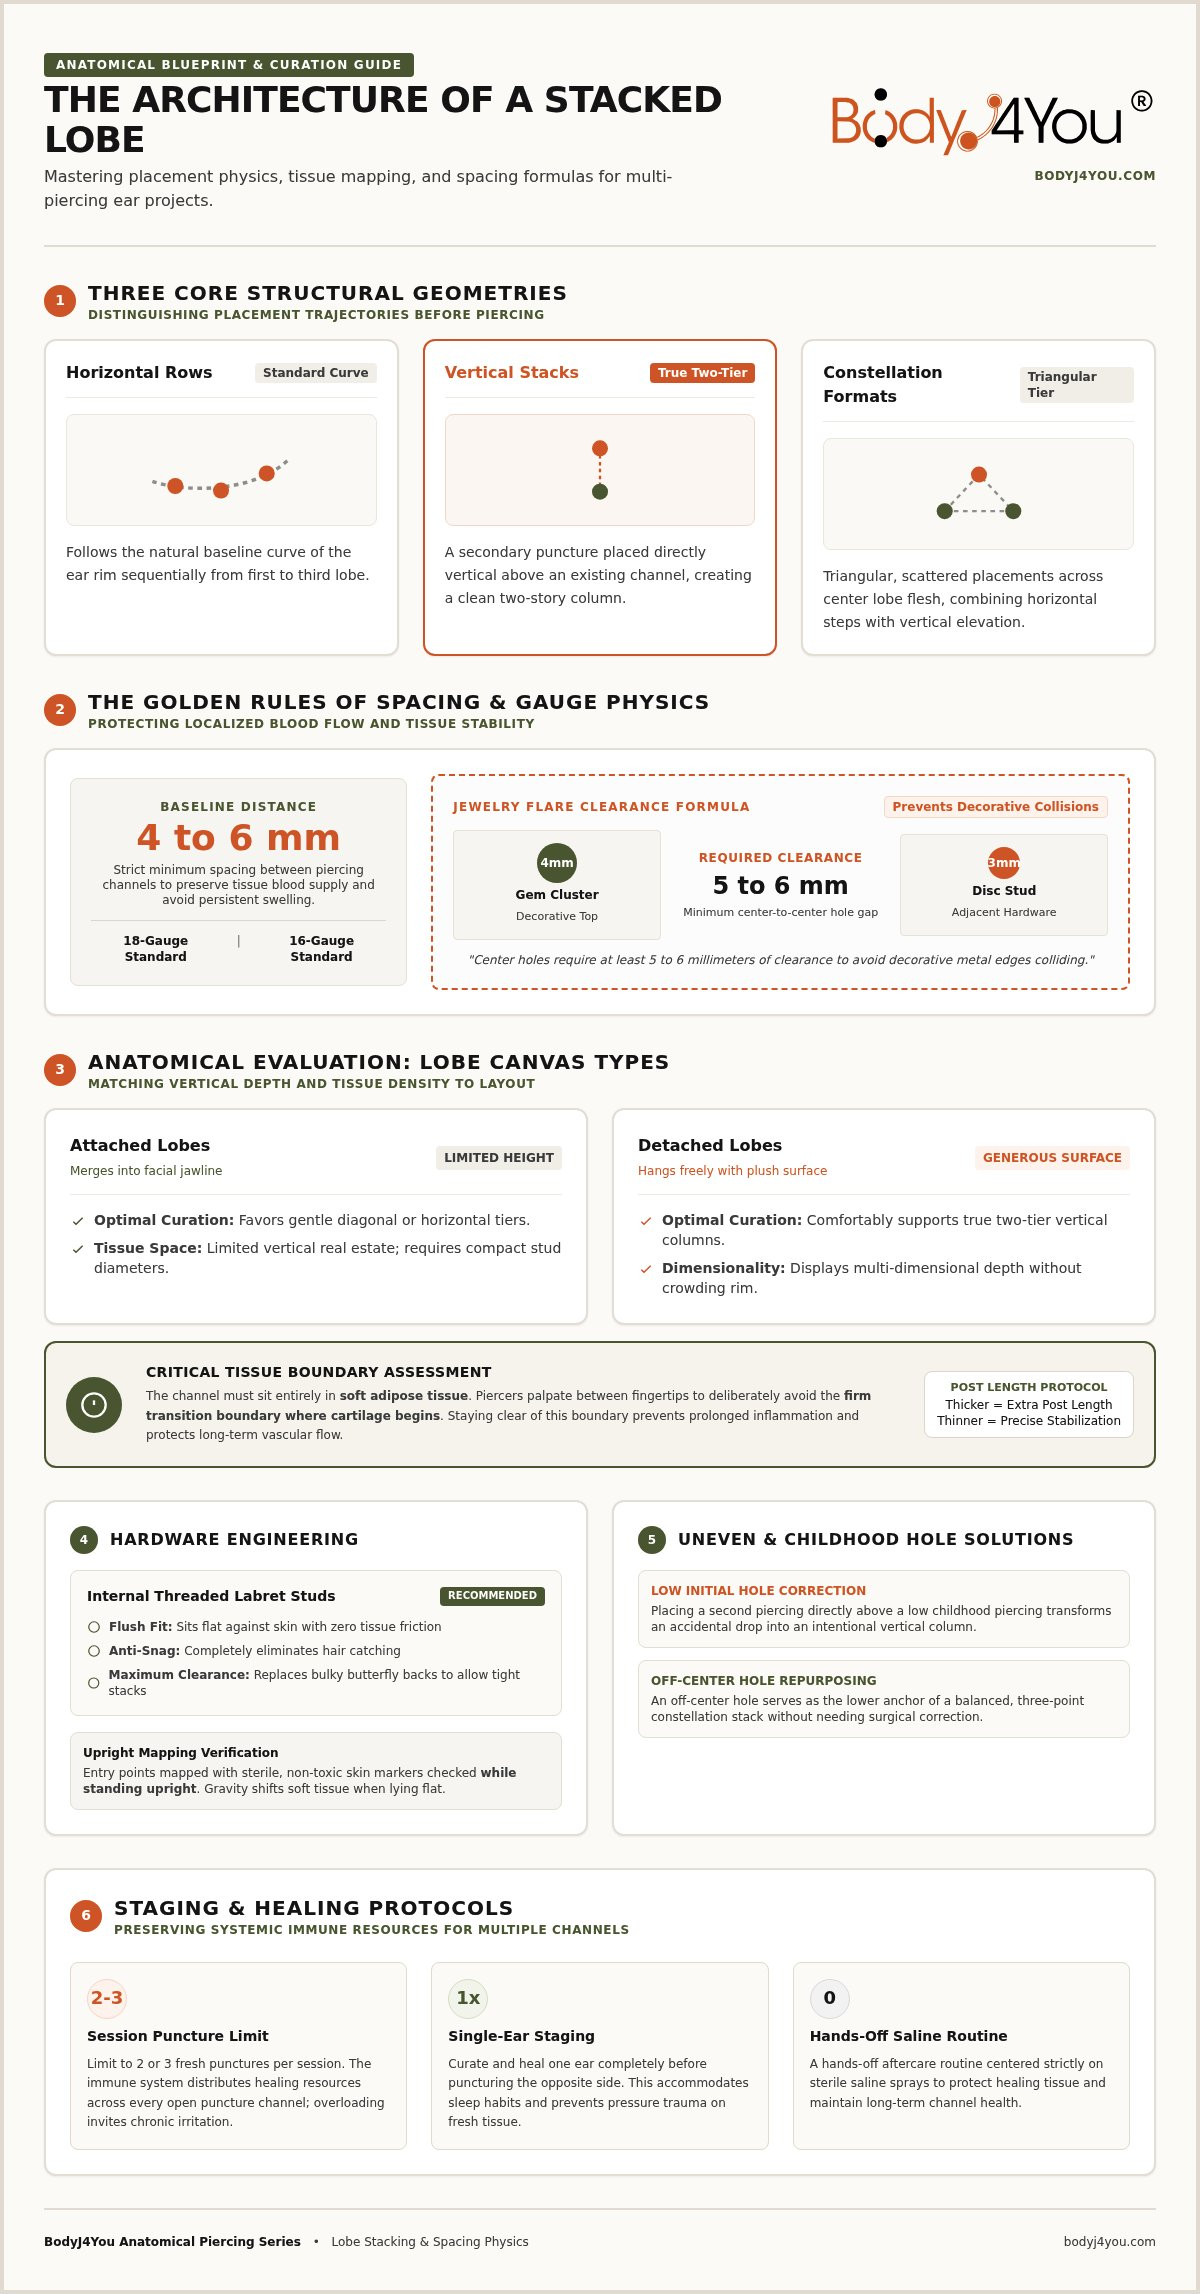
- Horizontal Rows: These track along the natural baseline curve of the ear rim from first to third lobe.
- Vertical Stacks: A puncture placed vertically above an existing channel, creating a clean two-story column.
- Constellation Formats: Triangular, scattered placements across the center lobe flesh, combining horizontal steps with vertical elevation.
Understanding these distinctions keeps your curated ear intentional rather than chaotic.
Evaluating Your Lobe Anatomy and Tissue Space
Safe curation depends entirely on your ear structure. When assessing how to stack lobe piercings, your piercer will evaluate tissue attachment and surface thickness. Attached lobes merge directly into the facial jawline, presenting limited vertical height that favors gentle diagonal or horizontal tiers. Detached earlobes hang freely, offering generous, plush tissue that comfortably supports true two-tier vertical columns.
Tissue density dictates your initial hardware. Thicker tissue requires a longer post to accommodate early swelling, while thinner tissue needs precise stabilization to keep posts from tilting forward. During an anatomy consultation, your piercer will gently palpate the lobe between their fingertips. This hands-on assessment ensures the new channel sits entirely in soft adipose tissue, avoiding the firm transition boundary where cartilage begins. Staying clear of this boundary prevents prolonged inflammation and protects long-term vascular flow.
How to Plan Your Lobe Stack: Essential Rules of Spacing and Proportion
A successful arrangement requires structural foresight. When learning how to stack lobe piercings, your layout should balance aesthetic ambition with biological reality. Professional piercers map entry points with sterile, non-toxic skin markers, checking the dots while you stand upright. Gravity shifts soft tissue when you lie flat, so verifying alignment while standing ensures your jewelry sits precisely where intended.
The Golden Rules of Piercing Spacing
Puncturing skin too closely together compromises localized blood supply, causing persistent swelling and slow healing. Maintain a strict minimum distance of 4 to 6 millimeters between piercing channels for standard 18-gauge or 16-gauge needles. You must also calculate jewelry flare. If you plan to wear a 4mm gem cluster next to a 3mm disc, their center holes require at least 5 to 6 millimeters of clearance to avoid metal edges colliding. Upgrading to flush-fitting internal threaded labret studs eliminates the bulky friction of traditional butterfly backs, giving your spacing maximum breathing room.
Working Around Asymmetrical or Uneven First Holes
Many first lobe piercings done in childhood with mechanical piercing guns sit too low, sit crooked, or differ between ears. You don't need to surgically correct old placements to build an intentional stack. Placing a second piercing directly above a low initial hole transforms an accidental drop into an intentional vertical column. Similarly, an off-center hole can serve as the lower anchor of a balanced, three-point constellation stack. Deliberate asymmetry often looks more artistic and personalized than rigid perfection.
Staging Your Piercing Appointments Safely
Patience protects your tissue. While planning a full ear project is exciting, limit fresh punctures to two or three holes per session. Your immune system distributes healing resources across every open puncture channel; overloading it invites chronic irritation and prolonged tenderness. Sleep habits matter just as much. Curate and heal one ear completely before puncturing the opposite side, ensuring you can sleep on your favorite side without placing direct pressure on healing tissue.
Styling Formulas: How to Combine Studs, Huggies, and Textures
Curating a balanced ear requires visual choreography. When exploring how to stack lobe piercings, random placement often creates visual clutter. A refined aesthetic relies on intentional formulas that balance weight, proportion, and light reflection. By treating your lobe as a cohesive composition rather than isolated holes, you can mix disparate jewelry styles into an effortless, unified collection.
The Ascending Size Gradient
The Cascading Rule anchors your styling profile naturally. Anchor your lowest primary lobe hole with your boldest piece, such as a chunky huggie hoop or a detailed statement stud. From there, taper your jewelry diameter upward toward the upper lobe: transition to a 3mm bezel gem in the second hole, a 2mm metallic dome in a vertical stack, and a dainty 1.5mm accent bead in the third position. This descending scale aligns with the ear's organic taper, drawing the eye smoothly upward along your natural jawline.
Creating Dimension with Hoops, Chains, and Flat Backs
Flat, repetitive jewelry flattens the ear. To build tactile depth, apply the "Textured Trio" formula: balance high-polish metal, sparkling gemstones, and three-dimensional silhouettes. Consider these proven pairings:
- The Anchor and Column: Fasten a close-fitting clicker hoop in the lower rim, backed by twin vertically stacked studs positioned directly behind it.
- The Kinetic Link: Anchor a minimalist stud to an adjacent channel with a delicate hanging connector chain to introduce fluid motion.
- The Ring Contrast: Introduce sleek captive bead rings alongside bezel-set crystals to contrast crisp curves against brilliant facet cuts.
Mastering how to stack lobe piercings means alternating these profiles so heavy, eye-catching elements never crowd each other.
Curating Metal Finishes and Cohesive Themes
Unifying your materials keeps multi-hole designs looking sophisticated rather than chaotic. A monochrome base of mirror-polished surgical steel delivers crisp, modern restraint. If you prefer mixing metals, follow a disciplined 70-30 ratio: select one dominant metal for seventy percent of your stack, reserving the secondary tone for thirty percent as deliberate accent highlights. Tie the arrangement together around a central motif, such as celestial starbursts, smooth geometric discs, or clean architectural bars, ensuring your ear looks intentionally curated from every angle.
Choosing Safe Jewelry Materials and Post Styles for Stacks
Your stack is only as reliable as the metal passing through your tissue. Learning how to stack lobe piercings successfully demands strict attention to post mechanics and material purity. Fashion earrings often utilize cheap mystery alloys, loose butterfly clasps, and rough exterior threads that scratch the delicate skin inside your piercing channel. Upgrading to body-safe, engineered hardware protects your investment and keeps your curation irritation-free.
Why Internal Threaded Labrets Outperform Butterfly Backs
Traditional butterfly clasps are notoriously problematic for multiple closely spaced holes. Their coiled metal loops trap skin oils, dead cells, and hair, creating an unhygienic environment that pinches recovering tissue. In contrast, flat-back labrets feature a smooth, fixed disc that rests flush against your skin. You can sleep, wear headphones, and comb your hair without catching sharp posts behind your ear.
The internal mechanism is equally vital. Externally threaded posts drag raw, serrated screw ridges through the channel, causing micro-tears and localized trauma during jewelry changes. Professional-grade internal threaded labret studs keep the screw post contained within the decorative end. The post slides into your ear like glass, ensuring zero friction against the delicate internal fistula.
Biocompatible Metals: Preventing Allergic Contact Dermatitis
Allergic contact dermatitis is one of the quickest ways to derail a new stack. Up to 35% of individuals with new piercings experience complications, with localized reactions and irritation leading the list. To safeguard your skin, stick strictly to verified materials:
- Implant-Grade Titanium (ASTM F-136): Completely hypoallergenic, exceptionally lightweight, and completely free of nickel impurities.
- Implant-Grade Surgical Steel (ASTM F-138): A reliable, mirror-finished standard that delivers durability and dermatological safety.
- Solid Nickel-Free Gold: High-purity 14k or 18k gold that resists tarnishing without leaching chemical alloys into open pores.
Never wear gold-plated, gold-filled, or mystery fashion alloys in healing or damp channels. Plated finishes routinely peel, exposing raw underlying copper or zinc that triggers severe redness and fluid discharge.
Channel diameter plays a massive role in long-term stability as well. Standardizing your stack around 18-gauge (1.0mm) or 16-gauge (1.2mm) posts gives your piercings the physical structure needed to hold heavier jewelry without migrating or causing a "cheese-cutter" slicing effect. If you need clarity on how these wire thicknesses translate to millimeters, consult our comprehensive ear gauge size chart before ordering new pieces.
Ready to upgrade your layout with body-safe essentials? Explore our premium internally threaded collection to build a comfortable, lasting stack designed for daily wear.
Aftercare and Healing: How to Maintain Multiple Fresh Lobe Piercings
Healing multiple punctures side by side requires disciplined biological support. While a single, isolated lobe puncture often settles in 6 to 8 weeks, learning how to stack lobe piercings means guiding several adjacent channels through recovery simultaneously. Concentrated tissue trauma demands greater vascular resources, extending the full maturation window to 3 to 6 months before your fistulas are resilient enough for frequent jewelry swaps.
The Daily Saline Cleansing Routine
Keep your daily cleaning routine gentle and entirely hands-off. Flush the front and back of your stack twice daily using an isotonic sterile saline spray for piercings. Outdated advice tells people to spin their earrings, but rotating posts breaks delicate new skin cells and forces crust into the open wound. After spraying, gently dab away softened secretions with dedicated piercing cleaning swabs. Always dry the back of your lobe thoroughly using sterile gauze or the cool setting of a hair dryer, as residual moisture pockets invite bacterial buildup.
Preventing and Managing Irritation Bumps
Friction and direct pressure trigger most localized swelling along fresh stacks. Sleeping on healing piercings creates shear stress that forces channels into permanent, crooked angles. If you sleep on your side, rest your head on a donut-shaped travel pillow so your ear sits suspended in the open center without bearing body weight. Be mindful of fibrous towels and hair strands that can hook decorative ends. If persistent friction bumps arise despite careful habits, consult our breakdown on how to get rid of piercing bump flare-ups for safe, targeted soothing techniques.
Knowing When Your Lobe Stack Is Ready for Downsizing
Your piercer deliberately installs longer posts on day one to accommodate initial swelling. Leaving these extended shafts in place past the early recovery phase causes posts to snag, tilt, and shift out of alignment. Schedule a downsizing appointment with your piercer at the 4 to 6-week milestone to swap in snug, flush-fitting labret stems. Save decorative clickers, heavy weights, and huggies for the 3 to 6-month mark once all tenderness, swelling, and fluid discharge have fully cleared.
Elevate Your Ear Curation with Confidence
Building a balanced, multi-pierced ear is an empowering blend of personal vision and anatomical respect. When you understand how to stack lobe piercings with genuine structural intent, you replace guesswork with lasting comfort. Give your tissue the breathing room it needs with calibrated spacing, let your jewelry scale taper naturally along your rim, and honor the unhurried timeline required for multiple channels to mature. Patience and precision always yield the most striking results.
Your ears deserve hardware engineered for lifelong wellness. Backed by over two decades of industry expertise, BodyJ4You delivers smooth internally threaded hardware designed to eliminate channel trauma, paired with clean, locally manufactured aftercare solutions formulated for gentle daily recovery. Explore professional internal threaded studs and aftercare essentials at BodyJ4You to give your new curation the safe, radiant foundation it deserves.
Frequently Asked Questions
Can I stack a new piercing above an existing lobe hole done with a piercing gun?
Yes, you can easily stack a new needle piercing directly above an old gun piercing. Gun-pierced holes often sit unevenly or rest too low on the lower rim, leaving generous vertical tissue above them. A professional needle placement can intentionally balance that old asymmetry. Your piercer simply evaluates existing scar tissue and positions the new channel far enough away to protect blood supply.
How much space should you leave between stacked lobe piercings?
Leave a minimum distance of 4 to 6 millimeters between piercing channels from center to center. This baseline gap preserves localized vascular flow and prevents tissue thinning between open wounds. When planning how to stack lobe piercings, you also must account for jewelry tops. Wider decorative pieces like gem clusters or disc ends require extra clearance so they sit flat without colliding or overlapping.
How many lobe piercings can you safely get at one time?
Limit yourself to getting no more than two or three lobe piercings in a single sitting. Puncturing tissue activates a systemic immune response, and healing multiple wounds simultaneously divides your body's regenerative resources. For safe healing, pierce one ear at a time. This approach lets you sleep comfortably on your unpierced side without creating pressure, friction, or angle migration on recovering channels.
Do vertical stacked lobe piercings hurt more than standard earlobe piercings?
Vertical lobe piercings feel nearly identical to standard lobe piercings in terms of pain, registering as a quick, mild pinch. Soft earlobe tissue contains far fewer sensitive nerve endings than rigid upper cartilage. You might experience a bit more post-piercing warmth or throbbing if you get two punctures in one session, but the sensation subsides quickly within a few hours.
How long does a stacked lobe piercing take to heal completely?
A stacked lobe piercing takes roughly 3 to 6 months to mature completely. While initial surface healing and swelling settle within 6 to 8 weeks, cluster piercings place higher demands on local tissue. Your fistulas need several months to strengthen before they can handle heavy hoops, friction, or daily jewelry changes without irritation, redness, or tenderness flaring up.
Why do piercers recommend flat-back labrets instead of butterfly backs for stacks?
Flat-back labrets sit completely flush against the skin, eliminating the bulk and friction that traditional butterfly backs create. Butterfly backs feature coiled metal loops that harbor dead skin, bacteria, and moisture while catching hair and pillow threads. In contrast, smooth labrets prevent channel distortion, provide snag-free daily comfort, and ensure closely placed piercings don't rub together behind the ear.
Can any ear shape accommodate vertical stacked lobe piercings?
Not every ear shape can safely support a vertical design when learning how to stack lobe piercings. Your piercer must evaluate whether you have enough vertical tissue height between your primary channel and the lower cartilage rim. Individuals with smaller or attached earlobes often lack the physical vertical space for a two-tier column, making horizontal tiers or diagonal constellation patterns a safer, more flattering alternative.


