Skip to content

BodyJ4You Blog

The Shocking History of Chokers (And How to Style Them) - BodyJ4you

The Shocking History of Chokers (And How to Style Them)

Unless you’ve been living under a rock, you’ve probably seen a choker necklace or two in your time. Whether it’s a grungy tattoo 90’s affair or a surfer-girl shell choker, this versatile piece of jewelry provides something for everyone. But did you know that the choker actually has a long history across a variety of cultures dating back to ancient civilization? Sit tight while we take you on a journey through the fascinating history of the choker, as well as provide you with some hot tips on how to style these bad boys.  What is the Meaning of a Choker Necklace? You may be surprised to hear that chokers actually hold more significant meanings than just being fashion staples worn by the likes of Britney and Gigi Hadid. Throughout history, the purpose of a choker necklace has been symbolic and practical. In Indian and Native American cultures, people of all genders have worn them for religious reasons or to cover or protect their necks from harm.  ​​ View this post on Instagram A post shared by Body Piercing, Fashion Jewelry (@bodyj4you)   History of Choker Necklaces  To understand why chokers are so popular, you really have to look at the history of this iconic piece of jewelry.  Ancient Mystic Powers  Believe it or not, chokers date back further than your mom’s hippie braided necklaces.  The earliest records of these tight necklaces are from Ancient Mesopotamia (about where modern-day Iraq is). Many of these necklaces were made of metal or intricate beadwork and would’ve been darn heavy. There is evidence of chokers also being worn in Ancient Egypt.  And, they weren’t just worn for style. They also had spiritual significance. According to Yvonne Markowitz, previous Curator of Jewelry at the Museum of Fine Arts, ancient women wore jewelry on the most vulnerable parts of the body (e.g. head, wrists, throat) as they believed it infused them with special powers. Yes, even before Sabrina the teenage witch got her hands on them.  Anne Boleyn’s Infamous “B” Choker One of the most iconic chokers was worn by everyone’s favorite side-piece, Anne Boleyn. Yes, the second wife of the infamous womanizer, King Henry VIII, had pretty damn good taste in jewelry, as can be seen below.  Anne Boleyn was Henry’s second wife, and he had her beheaded in 1536 after she was accused of adultery. So much for wearing necklaces for protection.  The harrowing fate of Anne Boleyn is part of the appeal of the necklace. Its history is also very mysterious. According to historian Claire Ridgeway, its origin and exact whereabouts are unclear. It was thought to be passed down to her daughter Elizabeth (later Queen Elizabeth I), and some say it’s part of the Imperial Crown of Queen Elizabeth II, but Ridgway says that there is no proof of this.  This chocker has reemerged throughout pop culture, its fans ranging from Ugly Betty to Bella Hadid. You can even get replicas with your own initial on them from Etsy, but the original “B” has the edge.  Symbolic Chokers, French Prostitutes and English Mockery The next time we saw the choker make a comeback was in 18th Century France. Marie Antoinette was another queen who was beheaded but also loved a good choker.  Her chokers weren’t just a fashion statement; they also became a political statement. After Marie Antoinette and a number of other influential people lost their heads to the guillotine, people in France started wearing red ribbons around their necks in solidarity. This sparked a new trend in England in a truly British fashion, ironically. English teenagers started wearing similar red necklaces mocking the French Revolution. That’s some Cardi B level pettiness.  By the time the 19th Century came around, chokers had a much more seedy reputation. A black ribbon choker was associated with prostitutes in this period in France. The picture above is the famous 1863 Edouard Manet painting ‘Olympia’. Many of the features, including the black ribbon around her neck, identify her as a prostitute. It caused quite a scandal at the time, and not even because of the nudity.   You can still get this salacious style of choker; check them out on our website. Alexis Karl: Accidental Choker Icon  Back over in England, the chocker trend was set to unintentionally boom. At the turn of the century, Queen Alexandra of Denmark rose to the throne with her husband, King Edward VII. Alexandra had been wearing extravagant chokers like the one below since she was a child, and not just because she was fashion-forward.  Rumor has it that she wore these gorgeous pieces to cover up a scar she had on her neck since childhood. It’s debated whether or not that’s actually true. Nevertheless, the trend caught on in the UK.  Gender Bending in the 70s Come the 1920s and 1940s, the choker was firmly in the American zeitgeist, being referred to as “dog collar” necklaces.  However, they started to be adopted by male rock stars in the 1970s. David Bowie, Jimmi Hendrix, and Mick Jagger set the choker trends as part of the gender-bending-glam-rock-chique. They reclaimed the choker regardless of gender, and men, woman, and all glamorous beings still rock the subversive choker look.  90s Grunge Choker to Present Day If you’re old enough to remember the 90s, you’ll know that chokers were everywhere. It didn’t matter if you were a goth girl with a velvety vampiric choker, or a fan of the girly henna choker; there was a choker for you. Since the 90s, chokers have been mainstream, being worn by Victoria Beckham, Avril Lavine, and Arianna Grande.  How to Style Choker Necklaces As you’ve seen in the long history of the choker, it is a versatile piece of jewelry, which can be made elegant or deviant, whatever your flavor. But if you want some more hot tips on how to style your choker, we’ve come up with some different essential choker looks for any occasion.  1.The Layered Effect This is a great choice for the elegant gal. You can carefully place necklaces of different lengths on your neck, chest, and décolletage. We advise starting with a dainty chocker at the top and layer as many necklaces as you like. This is works well as a casual look, but can also pair well with a stunning ball gown if you're heading out to a fancy event.   Hot tip: change it up between pendants, beads, and chains for a multi-material look that will pop. 🤩 2. Match Your Choker with Your Outfit You can get chokers in so many different materials; you could match your velvet dress with a stunning velvet choker. This look is great if you're ready to hit the club. If you’re a fan of color coordination, this choker styling is for you. This way, you can have a choker for every outfit (the dream 😍). If this is your vibe, check out our 24-pack choker necklace set.  3. Make a Statement Alternatively, you can let the jewelry do all the talking when it comes to your look. Go for a bold, statement choker to stand out from the crowd. Bust out a statement gold choker or a choker with metal spikes like the one above.  This look is fabulous for when you want to check out your local dive bar, or heading to a gig.  Are Chokers in Style? The question should be, have they ever been out of style? Chokers are very much in style, being worn by supermodels and music icons alike.  In the fashion forecast, it looks like chokers are here to stay. So why not check out our wide range of chokers? We're pretty sure you'll find something you like. 😉

Learn more
The Complete Guide for Piercing Aftercare: For Faster and Safer Healing - BodyJ4you

The Complete Guide for Piercing Aftercare: For Faster and Safer Healing

  Getting a new piercing is always exciting, but the journey doesn’t end when you step out of the studio.  Good piercing aftercare is vital for the healing process. A piercing is essentially a wound, after all, and your body needs time and the right care to recover fully. A sufficient cleaning and aftercare routine with the right products reduces the risk of your body rejecting the piercing. You’ll also be able to change out the jewelry sooner. This blog post will give you a step-by-step guide on caring for your new piercing, as well as the perfect products to help your piercing heal quickly and safely.  What is Piercing Aftercare? Piercing aftercare is the act of looking after your piercing. This includes keeping your piercing clean, avoiding activities that will irritate it, and giving it time to heal before you change the jewelry.  Aftercare Guide: How to Clean Your Piercing A trusted piercing studio should always give you aftercare instructions for your specific piercing. Some take longer to heal than others. But, here is a general cleaning guide that you can repeat until your piercing is fully healed. Wash your hands - Cleaning with washed hands is very important. Touching your piercing with unwashed hands is a fast track for infections. Wipe with a cue tip - soak a cotton pad or a cue tip in warm water and wipe away any crusty areas. (Sounds gross, but trust me, they’re a normal part of healing) Anti-bacterial soap - wash the site of your piercing with unscented soap. Saline solution - clean your piercing at least once a day with a piercing aftercare spray like saline solution. Some artists recommend cleaning it twice a day in the first four weeks until it is fully healed or whenever it’s infected.  Rinse - rinse the area thoroughly using warm water. Pat dry - use a towel to pat dry. Piercing Aftercare Advice: The Dos and Don’ts of Piercing Aftercare Looking after a new piercing is easy when you follow the right steps. However, there are some things you should avoid to help protect against infection. No one wants a rejected piercing.  So here are the dos and don’ts of piercing aftercare etiquette: Warning: some initial redness, tenderness, swelling directly after piercing, and white/yellowish discharge are a normal part of the healing process. But if you do notice any dark yellow or green discharge, you notice a large hard lump, or it smells funny, consult your piercing studio or your doctor.  Do Clean Regularly  Follow a strict cleaning routine, especially for the first four weeks after getting your piercing. Keep away those furry friends and only touch those earrings with clean hands.  Do Avoid Irritants Whether it’s rolling over when you’re sleeping or taking your T-shirts off more carefully, do be careful around your new piercing. You can even use a travel pillow to elevate any ear piercings while you sleep. The less you touch it, the less likely it is to get infected.  Avoid harsh chemicals that can irritate the wound, including cleaning products with alcohol in them. Swimming is also off limits thanks to chlorine or any other bacteria that might be found in a swimming bath or body of water.  Don’t Change Jewelry Too Soon You need to give your piercing sufficient time to heal before you start changing it out for some fancy hoops. You can change earlobe piercings after a minimum of six weeks, and cartilage can be changed after a minimum of six months. It can take between nine months and a year to fully heal, especially if you have complications.  Don’t Rotate Your Piercing You might want to turn your piercing while cleaning it or removing hardened discharge. Don’t. You can accidentally remove the ball from any jewelry, and you might agitate the wound and cause an infection.  Piercing Aftercare Products  View this post on Instagram A post shared by Body Piercing, Fashion Jewelry (@bodyj4you) It can be tempting to use every product under the sun to help your piercing heal. This isn’t a good idea. As we outlined above, there are some products to stay away from, especially ones containing alcohol. These products can actually cause irritation and your piercings to get infected.  There are, however, a number of products that are perfectly safe to use during the healing process.  Psst, you get all these piercing aftercare products from BodyJ4You. 🤫 Salt Solution  Sea salt is a great natural cleanser for wounds. If you don’t happen to live by the ocean, you can buy a handy sea salt solution. You can even get a specialist piercing aftercare mouth rinse to clean mouth piercings.  You can also make a salt solution at home with ¼ of a teaspoon of sea salt and a cup of boiled water. Make sure you use non-iodized salt.  Saline Spray    @bodyj4you Repost @jasminl33_ showing how she uses our saline spray to keep her ear piercings clean and healthy! #curatedear #piercingaftercare #piercing ♬ original sound - BodyJ4You   As we mentioned before, saline spray is one of the safest cleaning products to help the healing process.  This is a piercing aftercare spray that will help remove dirt and dried discharge and stop your new piercing from getting infected.  Jojoba Oil Especially good for stretched piercings from gauges, jojoba oil is a product made from natural materials that can help speed up the healing process. It speeds up wound closures by encouraging the body to produce collagen. Jojoba oil also acts as a moisturizer which helps prevent skin irritations.  Piercing Bump Treatment If you want to find out all about piercing bumps and how to avoid them, check out our previous blog.  Piercing bumps can be a menace to anyone, even if this isn’t your first time getting a nose ring. This is when a piercing bump treatment might come in handy to help keep those annoying bumps away.  Piercing Aftercare Summary A lot of piercing aftercare is common sense. There are some helpful products to speed up the process, but most of it takes time and patience.  Here is a little summary of everything we covered on how to look after your piercings:   ✅ DO only touch your piercing with clean hands. ✅ DO follow a strict cleaning routine for the first four weeks. ✅ DO use recommended cleaning products such as piercing aftercare spray and jojoba oil. ✅ DO avoid sleeping on your piercing while it’s healing. ✅ DO use a travel pillow or elevate your piercing while sleeping.✅ DO be careful not to aggravate the piercing when styling hair or taking off clothes.  ❌ DON’T rotate or turn your piercing.❌ DON’T clean your piercing with alcohol, peroxide, or harsh products like Bactine.❌ DON’T go swimming for the first four weeks.❌ DON’T change your jewelry too soon.❌ DON’T pick or scratch at any dry matter around the site.❌ DON’T drink alcohol up to 24hrs after you get your piercing.  

Learn more
How to Get Rid of Piercing Bumps (and Keep Them Away)

How to Get Rid of Piercing Bumps (and Keep Them Away)

You’ve taken the plunge and got yourself a brand new piercing. Congrats! But you’ve started to notice a pesky bump around your piercing, even though you’ve been doing your piercing aftercare.  Don’t panic. These bumps can show up for anyone, even veterans. So, how do you make a piercing bump go away? In this blog, we’ll give you the complete breakdown of the best piercing bump treatment, including what to avoid and which products to use.   *Psst* We’ve made a handy video if you’re more of a listener than a reader. 😉 What is a piercing bump? Before we get started telling you how to get rid of a piercing bump and piercing bump treatment, let’s pin down exactly what one is. A piercing bump is a hard piece of tissue that forms inside or near the piercing. They usually occur in areas of more dense tissue like the cartilage or your nose. There are a few types of piercing bumps:  hypertrophic scarring,  cysts caused by dead skin or hair, or  swelling of infectious fluid. Not ideal.  Do piercing bumps go away? The short answer is yes; most piercing bumps will reduce over time. Even a persistent cyst or abscesses will get better with the help of some home remedies or a specialist piercing bump treatment.  However, if you are dealing with a keloid, it might be a different story.  Piercing bumps vs keloid There is an important distinction between a piercing bump and a keloid.  So, what is a keloid? It is a larger, rubbery (often permanent) scar. It will stand out from any other kind of bump because it will be much larger than the surface area of the wound. These troublesome bumps have three times more collagen than hypertrophic scars and 20 times more collagen than healthy skin.  Unfortunately, keloids can’t be as easily taken care of with at-home piercing bump treatment. If you think you have a keloid, it’s best to go to a dermatologist as you might need steroids, a chemotherapy injection, or even have it surgically removed.  This may all sound scary, but keloids are rarer than the average piercing bump. You’re more likely to experience keloids if you have a darker skin tone or if there is a family history of keloid formation. The long and short of it is if you haven’t had a keloid by the time you’re in your 20s, the chances are you won’t be getting one anytime soon. How to make a piercing bump go away Now that you’ve identified that you have a piercing bump and not a keloid, here is a step-by-step guide on how to treat it.  1. Find out what’s causing the issue It may sound obvious, but it’s the most important step. There are many factors that lead to skin irritation, especially around the site of new piercings and tattoos. It might be something in your daily routine, so think about what you’ve been up to since you got your piercing. Common causes of bumps include a new piercing snagging or getting caught on something. This can happen in the first sixth months after getting your piercing if you sleep on it funny or catch it on something like your headphones.  Other causes include poor fitting or poor quality jewelry, dirt getting in the wound, changes in humidity, or dramatic changes in air pressure (so maybe hold off on getting that helix before your holiday ✈️ ).  New piercings are really exciting, but it’s important to remember that they act like wounds, and the skin needs time to heal. So remember to wash your hands regularly before touching your piercing, and maybe stay off the animal cuddles until it’s fully healed. 2. Check the jewelry  When getting a piercing, there are a few things you need to check the quality of the jewelry is one of them. This is why it’s really important to get your piercings done at a professional studio.  While it may be tempting to try and save a few dollars on a cheaper piercing, you’re going to pay for it in the long run. Make sure your stud or ring is made of an appropriate material like stainless steel, surgical plastic, or even glass.  Even if it’s made from a good quality metal or plastic, a poor-fitting piercing can cause just as many issues. When the jewelry is being fitted, there needs to be enough room for swelling.  If you think your jewelry might be poorly fitted, go to a trusted piercing studio in your area, and they should be able to check the quality of your piercing. 3. Clean your piercing One of the most important steps of a piercing journey is aftercare. Cleaning your piercing every day will reduce the chance of cysts or bumps appearing. You don’t necessarily need anything fancy; an antibacterial soap should be enough. But if you want to take that bit of extra care, cleaning the piercing with a sea-salt solution will help protect against infection.  4. Get a piercing bump treatment    @bodyj4you New!! Piercing Bump Aftercare Treatment,Scar Removal Shrinking Keloid Soothing Skin Recovery,Ear Lobe,Tragus,Nose,Lip,Natural Solution Oil Drop (10ml) #bodyj4you #piercingbumb #oiltreatment #piercingtok #bodyjewlery #soothingskincare #skincaretiktok #oildrops #aftercarepiercing ♬ original sound - BodyJ4You   All these tips are great for avoiding getting an abscess in the first place, but what if you’ve already got a piercing bump?  Well, then it’s time to try a piercing bump aftercare treatment. Oils such as BodyJ4You Bump Solution can reduce redness, swelling, and scarring. Apply natural aftercare like this two to three times a day.  5. Try home remedies   We’ve already mentioned salt solutions, but there are a few remedies you can try with things you can find in your (or your mom’s) kitchen cupboard.  Some bumps respond well to a herbal press, which can be made from camomile tea and hot water. The camomile reduces the inflammation and the heat can help draw out some of the irritation. The same can be done with tea tree oil and turmeric (which has antiseptic properties).  If none of these work, apple cider vinegar is a very effective home remedy. A study conducted by the European Journal of General Medicine concluded that it was an effective remedy against infection due to its percentage of acetic acid.  6. Be patient Sometimes the best remedy for a piercing bump is time. As we mentioned before, when you get a new piercing, your body is healing from a wound — and it’s very good at doing that. Before you jump to try all the forms of piercing bump treatment, give the site time to heal, which can take a few weeks or months. Experts recommend waiting three to six months before changing your jewelry.  However, if you have a piercing bump that won’t go away after more than six months, consult your doctor or your dermatologist. 

Learn more
Ear Stretching: What You Need To Know Before and After - BodyJ4you

Ear Stretching: What You Need To Know Before and After

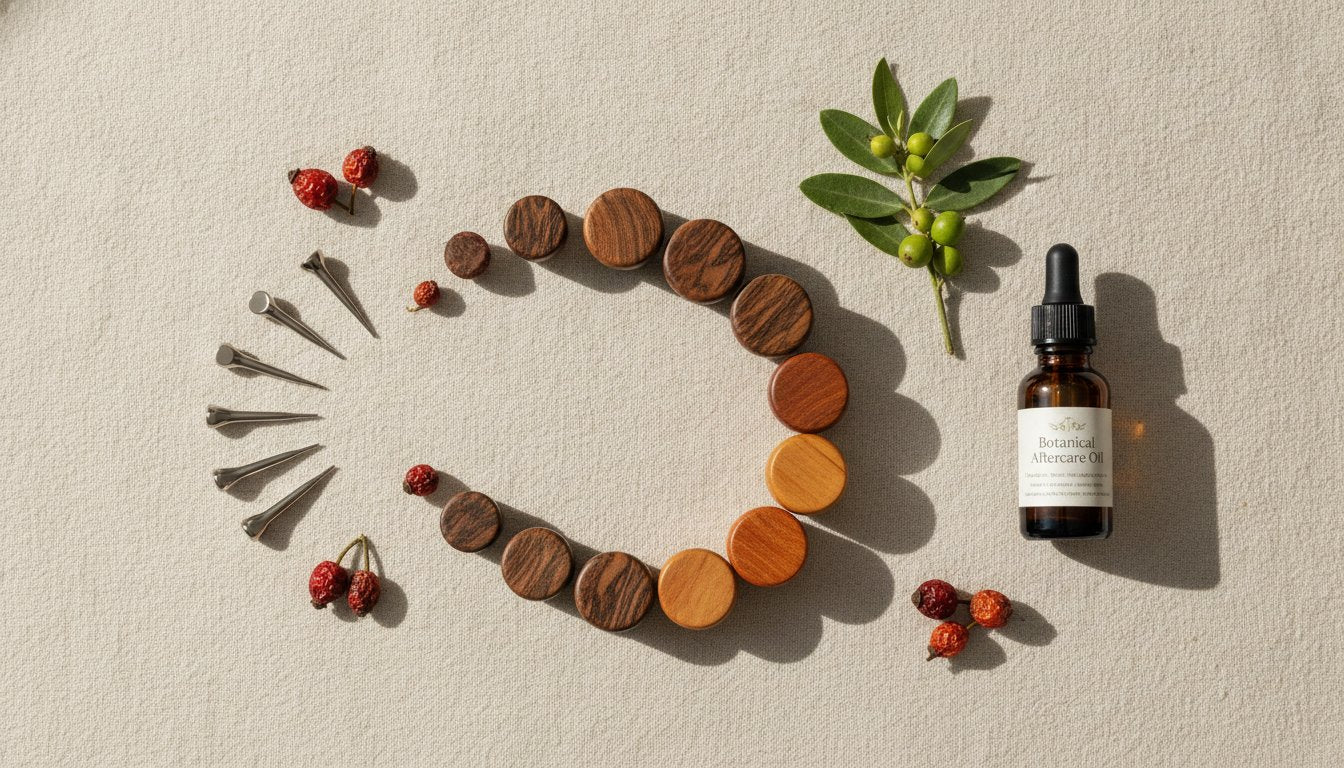
Intro To Ear Stretching Ear stretching is a process that takes time and most of all patience. When stretching it is most important that you are paying very close attention to your ear lobes. Make sure there are no tears, cuts, or blowouts. When on your stretching journey, or even after, it is important to make sure you are still caring for your lobes with the right ear stretching aftercare products. Ear stretching is something that requires time, patience, and lots of attention. You have to always be keeping up with the care. That means paying attention to sizing, skin, cleaning, products, and doing some research. It’s a job but worth the work in the end! Ear Stretching Kit Recommendation If you are thinking about stretching your ears, you need to have the right material! Stainless Steel is best and highly recommended. BodyJ4You has a Stretching Kit of 37 pieces. This kit comes with tapers and tunnel plugs that go with each size you stretch to. Or if you prefer acrylic, BodyJ4You also has a variety to choose from! You also have the option of using silicone tunnels if preferred. Keep in mind everyone’s skin is different and what works for others might not work for you. This is where BodyJ4You comes in to help you find what's best in your stretching journey! Find what kit suits you!   Shop here! Ear Stretching Aftercare Now that you have the jewelry, you need an aftercare product to stretch with. When stretching, you need a product that helps your skin to smoothly stretch and keep hydrated. At BodyJ4You we have a Gauge Stretching Balm.  How this works: apply the balm to your ear lobes and around your ear stretching jewelry (plugs, tunnels, eyelets, hangers..etc). You then start to stretch. Remember to go slow and listen to your body. If needed, apply more balm to jewelry.    Shop here!   View our Ear Stretching Video to see a visual representation of how to stretch your earlobes correctly. More Aftercare Suggestions  After you have stretched to a new size (gauge), it’s important to clean around your piercing so no buildup happens. This will help prevent infections or irritations. BodyJ4You has a Piercing Aftercare Solution to use on all piercings. Before cleaning, you should wash your hands and make sure everything being used is clean. If preferred to keep the piercing in, you could apply the solution to a q-tip, then apply the product around where the skin and jewelry touch. Make sure to get all around the jewelry and clean it very well! Or you can soak your lobes in solution to clean deeply.    Shop here! Jojoba Oil is something that is highly recommended and widely used in the ear stretching community. It contains Vitamin E Complex, Vitamin B Complex, Silicon, Chromium, Copper and Zinc. Not only can it be used for your skin, but also for your hair. It's great to apply to healing skin or at whatever stage you are in your stretching journey. For best results, take out your jewelry and apply oil to your lobes. It is great to massage your lobes with oil for about 10 mins. This helps heal any wounds and helps strengthen your skin. Shop here!  Maintenance The best way to keep your ears healthy is to try and clean them daily. For example, when you take a shower you can take out your jewelry and clean your lobes. After, massage your ear with the Jojoba oil. Then apply some balm and insert your jewelry. During this time you should also be examining your ear. Looking out for cuts or potential blowouts. If skins look a little too red or purple. If your skin seems to be thinning out, the jojoba oil is great as it helps thicken the skin. If really bad you must size down to help the skin thicken and repair itself.  Be sure that whenever changing your jewelry, you are cleaning it well for the next use. BodyJ4You also has a 3 Piece Solution Set which includes the Piercing Solution, Gauge Stretching Balm, and Jojoba Oil. Shop here!   How To Deal With Ear Issues? It's important to stretch properly in order to maintain healthy lobes. If ever there is discomfort in the ear, it is then best to size down.  If you put too much pressure on your lobes it can cause a bad blowout. This can cause the skin to turn purple and turn inside out. If this is the case, you need to take out the jewelry immediately and size it down to an appropriate size. Pay extra close attention to the skin and keep it clean to prevent infections.  After getting to your goal size, you want to make sure you stay there! Sometimes we get too comfortable and forget our gauges are even there. Be sure to be careful so that nothing hits, tugs, or hurts your lobes. Know what jewelry feels right for you. Nothing too heavy or something that can get caught. Be sure to also not play with your jewelry. You don’t want to be fumbling with it and something is not right. It’s possible that bacteria can get in or your jewelry can slip out.   BodyJ4You babes with stretched earlobes! View this post on Instagram A post shared by Body Piercing, Fashion Jewelry (@bodyj4you) View this post on Instagram A post shared by Body Piercing, Fashion Jewelry (@bodyj4you) View this post on Instagram A post shared by Body Piercing, Fashion Jewelry (@bodyj4you) View this post on Instagram A post shared by Body Piercing, Fashion Jewelry (@bodyj4you)

Learn more
Are Chokers Still In Fashion? - BodyJ4you

Are Chokers Still In Fashion?

If you go to music festivals, clubs, shopping malls, or really anywhere with an age demographic between 10-60, you have most likely seen people wearing choker collars. Chokers are a great accessory for a variety of different looks but before we dive into the different types of chokers and how to style them, we are first going to talk about where chokers first originated! Origin and History of Chokers  Wearing choker necklaces dates back to thousands of years ago with the first people to wear them being the Sumer empire in Mesopotamia and Ancient Egypt. Why did these women wear them you may ask? Women in these cultures wore them not just for appearance but for two main reasons: protection and power. Egyptian women especially believed that gold jewelry gave them superpowers because they associated it with the sun and life-giving powers of the Nile River. These chokers were elaborately decorated with multiple strands of beautiful beadwork and stones. After this period in time the next era that chokers were popular again were during the Renaissance. During Alexandra of Denmark’s reign as Princess of Wales, she became a notable figure in fashion and popularized her favorite piece of jewelry. They would continue to stay popular in the Art Nouveau period but faded after the Art Deco period in the 1930’s. They didn’t become popular again until the 90’s where they were a major hit. Today, with the rise in 90’s throwback culture, they may be more popular than ever with people donning them everywhere they go and truly embracing their inner 90’s aesthetic. Popular Chokers and How To Style Them Tattoo Chokers: These are one of the most popular types of chokers on the market today. They are the true essence of 90’s style and the nostalgia factor is why many people love to wear them. You can wear a simple black one or brighten it up with a rainbow or pastel color. They even have tattoo chokers with flowers or beads embedded into them and some even have charms! How to Style: You can create so many different looks with these types of chokers. Simple black ones are good for an edgy, alternative look and are paired best with crop tops, flannels, band tees, and tanks. Colorful tattoo chokers look good with vibrant colored clothing and also pair very well with bright festival outfits.  Shop this set here!4 View this post on Instagram A post shared by Body Piercing, Fashion Jewelry (@bodyj4you) View this post on Instagram A post shared by Body Piercing, Fashion Jewelry (@bodyj4you) Leather Chokers with Rings: Another very popular type of choker are leather chokers that have rings in the middle. They come in many different colors such as black, white, and pink with black being the most popular color. They also can have different shaped rings such as hearts. Many people may associate these types of chokers with goth culture and that is very true but anyone can wear these types of chokers! They can be paired with many different looks! How to Style: Like black tattoo chokers, these also pair well with an alternative, edgy look and some may even create an entire black look when wearing them. They are perfect for wearing to concerts or a night out at the club. White and pink chokers are perfect for summertime looks and actually pair well with swimwear!  Shop this set here! Leather Metal Spike Chokers: If you want to truly embrace the goth, punk, and/or metal scene then these are the chokers for you! These types of chokers were very common in the 90’s and come in a variety of different shapes. They are typically black in appearance and are rarely seen in other colors. How to Style: Like the two mentioned before, these types of chokers pair great with a metal, alternative style such as dark-colored flannels, black clothing, and band tees. They are definitely a very unique look and can be found on people in the mosh pits of your favorite metal/punk bands!    Shop this set here! View this post on Instagram A post shared by Body Piercing, Fashion Jewelry (@bodyj4you) Velvet chokers: These are slightly more simple than the chokers mentioned above. They can come in a variety of different colors such as black, burgundy, blue, green, ect. Some may even have charms dangling from them.  How to Style: They are super soft and can honestly be paired with most any look such as basic tees, crop tops, and even dresses. Can be dressed up or down!    Shop this set here! Long Tie-Around Chokers: These types of chokers are long strands that can be tied around your neck typically more than once and can be styled a variety of ways. They come in a variety of colors such as black and burgundy. Sometimes they may have beads at the ends of them to give them even more pizazz.  How to Style: These types of chokers are more fashionable than your average choker. They pair great with a basic tank but also can add a nice finishing touch to a dress.    Shop this set here! No matter which style choker you choose, know that you are making a fashion statement by wearing one! Check out all of the beautiful different types of chokers that BodyJ4you has today!       

Learn more
Piercing Guns vs Needles: Which is Better? - BodyJ4you

Piercing Guns vs Needles: Which is Better?

When you’re getting your next piercing, you may end up having to choose between a professional that uses either a piercing gun, or one that prefers a needle. Depending on which one they use, you may end up with different results at the end of the process. But what’s the difference between the two? Before making a decision about which way you want to go, it’s a good idea to find out what you’re in for with either option. Today, we’ll be touching on the pros and cons of each, before making an assessment of which is generally better to go for based on the latest industry trends.  Piercing Guns and Needles: The Basics To understand the core difference between the piercing guns and needles, it's helpful to understand each on their own. A piercing gun is an ear piercing instrument that drives a pointed starter earring through the lobe. These are reusable and commonly found in jewelry shops in shopping malls. As a result, they aren’t always used by people who have had sufficient training. Needles are commonly used as an alternative, and in the piercing space they are the same as those used by medical professionals. These needles are not designed to remove tissue, rather just opening up space in the skin for the jewelry to nestle gently into.  Piercing Gun Pros & Cons One of the first positives about piercing guns is that they are relatively easy to use, and are widely accessible. You won’t struggle to find somewhere on short notice, although it can be risky to take a gamble on a new space you haven’t been referred to. Piercings from guns are cheaper if they come from a person that isn’t professionally trained to conduct them, and are very quick (a single pull of the trigger). The associated risks are however pretty high. Piercing guns are less versatile than needles: they are designed to be used exclusively for earlobes. Tissue trauma is more likely than with a needle, which can cause additional swelling and increase the risk of trauma.      Needles for Piercings: Pros and Cons Needles are single-use objects, meaning they won’t be used from one person to the next. This offers a clean, sanitized solution that reduces the risk of infection. Done correctly, needle piercings should not be overly painful, as they are very sharp. They are versatile instruments that can be used in many different parts of the body, leaving room for you to explore from piercing to piercing. There is an important downside to keep in mind. Needle piercings require trained professionals, meaning that they will likely be more expensive than when you use someone with a piercing gun in a mall. The added cost for professional care may end up being well worth it, especially once the piercing has healed without any problems.  The Better Fit Based on Your Needs Side-by-side, it looks like although piercing guns and needles both have a list of pros to keep in mind, the latter does seem to have less downsides to consider. Both involve relatively simple techniques, each of which poses its own risks. At the end of the day, the decision is yours to make based on your own needs. The BodyJ4You team is here to make the process of getting a piercing as simple as possible for you. Once you’ve decided the route you’re going to, check out our piercing kits and jewelry options for added inspiration.

Learn more
Everything to Know Before Getting a Nipple Piercing - BodyJ4you

Everything to Know Before Getting a Nipple Piercing

Nipple piercings are gaining popularity all over the world. Traditionally, these rather simple body piercings at the base of the nipple have struggled to gain klout due to stigma and a host of misconceptions around getting them in the first place. If you’re thinking about getting a nipple piercing in the coming weeks, it’s good to quash any myths and to set yourself up for the best possible experience. This guide touches on everything you need to know before you start the process, including pain expectations, the possible complications you should be aware of, as well as the healing time you’ll need for it to be 100% sorted.  Expected Pain Levels If you’re getting one or both of your nipples pierced, you should expect some pain during the process. Both during and for the week after it is done. Because of the high amount of nerve endings in the area, it is considered to be one of the more sensitive spots for piercings or tattoos. Although the immediate pain will go away during the course of the first seven to ten days, the spot may feel slightly tender and a bit irritated as it goes through the longer healing process. At the end of the day, the result will be well worth the effort. Go into the experience prepared to experience some discomfort, all the while staying mindful about why it is you’re doing it to begin with.  Average Healing Time Any piercing requires going straight through the skin, your primary defense against infections every day. A foreign “disturbance” is going to put your skin under some duress, resulting in an immune system response. Nipple piercings can take a long time to heal based on where they are located and because you have to wear clothing as you go about your day. Expect an average total healing time of nine to twelve months, factoring in that additional complications might cause trouble along the way. Let’s detail what some of these might be so you know what you may be dealing with.      Potential Complications Down the Line While the area is still inflamed, there is a greater likelihood that it can get infected, mostly due to the accumulation of fluid in the tissue around the wound. A clear sign of this is unusual redness, swelling and drainage that is clear in color. Other responses from the body may include a hot or sensitive nipple, fever, aches, rashes and general fatigue. If the redness spreads beyond just the area that was pierced, it’s important to see a medical professional to make sure everything is alright.  A Boost for the Recovery Process At BodyJ4You, our aftercare products are specifically designed to give the healing process after getting any type of piercing a much needed boost. We’ve even added piercing kits to our catalog to ensure that the highest quality, safest products are out on the market. Nipple piercings are slightly more complicated than others, requiring more maintenance than the average piercing. That’s not to say that they aren’t worth the effort. Before you know it, you’ll be showing off the latest addition to your body on the beach in summer, or simply privately in the comfort of your own home. 

Learn more
Piercing Pain Guide: The Most Painful Areas for Piercings and Tattoos - BodyJ4you

Piercing Pain Guide: The Most Painful Areas for Piercings and Tattoos

Body piercings and tattoos have long stopped being taboo, with millennials and Gen Z’s actively using them as a form of creative expression these days. Although Baby Boomer’s may still take some warming up to the ideas, times are changing (and have already changed) very fast. No matter how old you are, if you’re considering getting one or the other in the near future, you’re going to want to know about the areas that are most painful to do so. This guide will help with deciding exactly where you want the tattoo or piercing should go, before starting to get excited about what lays ahead.  Why Do Piercings and Tattoos Hurt So Much? Although the pain does tend to subside quickly, it’s no secret that it hurts to get a tattoo or a piercing. This is simply a natural response to undergoing the needle-based injection of ink into the skin, or a hole being made somewhere on the body. Tattoos “damage” the skin to an extent to achieve the desired result, which is why painful swelling occurs too. In a more technical sense, tattoos and piercings hurt so much because they bring nerves into contact with a needle or piercing gun. A general rule to keep in mind when you’re choosing an area: the fewer nerves in the area, the less pain you are likely to experience.  Consider Variable Pain Thresholds That said, we’re all wired differently at the end of the day. This makes it impossible to generalize and assume that one person will experience the same level of pain than another. There are a couple of indicators, many of which are based on scientific research, to suggest that a few factors might affect people’s pain threshold. These range from sex (women tend to experience pain more intensely than men), to age, weight and even experience. You won’t have a true idea about your pain threshold relative to tattoos and piercings if you haven’t done it at least once.  Expectation Setting: Different Types of Pain When getting any tattoo or piercing, you’re likely to experience different types of pain based on how these are done. There are general sensations that people have experienced and shared, including background (or dull), burning, scratching, vibrating and stinging pain. An experienced tattoo or piercing artist will be able to tell you which one to expect based on where you’re getting your new creative addition. By setting a few expectations, you’ll be able to tell when things aren’t going according to plan, especially if it is your first time. Work with a professional that communicates openly about this, offering peace of mind that you are in good hands along the way.    The Most Painful Areas for Piercings There are a couple of areas on the body that are known for being more painful than others. Knowing about these will help you to make a more informed decision about where you should be getting yours. Genital and nipple piercings are typically very painful, mostly because of the amount of nerve endings in these areas. Nose and dermal piercings come in a close second, although the latter can be relatively painless if it is done in an area that isn’t very nerve heavy. Think carefully about trying one of these four types of piercings, especially if you’re a first timer or have a low pain threshold to begin with.  Higher Pain Spots for Tattoos Just like with piercings, tattoos also have a few places on the body that tend to cause more pain than others. Areas that are close to bones, where the skin is very thin or where the space is devoid of too much fat may lead to high to severe pain levels. Tattoos are generally highly painful when they are in the armpit, rib cage, ankles, shins, groins, lips or behind the knees. These spots can be tricky to tattoo to begin with, so make sure you are working with an experienced artist who can answer your questions and get you the exact outcome you’re looking for. If you’re wanting to gauge things first, with an intention to come back and get another tattoo later, stick to a more common area like the forearm, shoulder or one of your calves to keep things simple. Quick Tips to Reduce Pain During Either To make sure you have as little pain as possible during the piercing or tattooing process, there are a couple of precautions you can take on the day. It’s important to go in sober, as having thinner-than-usual blood can cause additional complications in the moment along with potential problems during the healing process. Eat a full breakfast and drink lots of water, preferably after a good night’s sleep to give your immune system a boost. Ask to take a few breaks in the process if the pain is starting to feel too much. Use mindfulness techniques like meditation to focus on other things while you’re sitting in the chair. Breath deeply through the process, and enjoy a casual conversation with a friend or the artist to help the process feel shorter than it actually is.  Additional Support If you have any questions about the tattooing or piercing process, the BodyJ4You team can help. We’re happy to help wherever we can to offer you more peace of mind about the incredible process you’re about to embark on. If you’re looking for specific piercings, gauges, belly rings, glass jewelry and more, we’ve got you covered. Our high quality products have been tried and tested and are designed in a way to make the process as seamless as possible. All you have to worry about now is the creative side of the process, and in a couple of weeks you’ll be showing off your brand new ink or piercing with a broad smile on your face. Relax, and enjoy the ride. 

Learn more
Tattoo Aftercare:  What You Need to Know to Keep Your Ink Looking Fresh - BodyJ4you

Tattoo Aftercare: What You Need to Know to Keep Your Ink Looking Fresh

So you’ve made the decision to get some new ink this year. Hell yes! This is an exciting decision that should be embraced with open arms. Doing so means planning everything from the design to who will be doing it, right through to how you’re going about preventing infection and keeping the tattoo looking its best over time. You’ll (hopefully) be living with it for the rest of your life after all. If you’re about to get a tattoo for the first time, or you’re a returning customer looking to get some fresh ink, the recovery process is exactly the same. Here are the basics for you to be mindful of.  Why Tattoo Aftercare is Important Any time you open your skin, your body is vulnerable to scarring and infections. Aftercare is essential to minimize the risk of either, and to help your new work of art heal as quickly as possible. The tattoo artist has an important role to play here. If they can’t give you advice on the best way to go about aftercare, they might not be the best person to do the tattoo itself. Moisturizers and creams are a godsend when it comes to recovery. Check out our video on the benefits of using a tattoo aftercare cream to learn more about what they can do.  View this post on Instagram A post shared by Body Piercing, Fashion Jewelry (@bodyj4you) Early Stages: Preventing Infection The #1 goal during the early recovery process should be to prevent infection. Although only a small amount of people experience complications after getting a tattoo, with more people getting tattoos these days, the number is on an upward trajectory. Preventing infection requires thorough yet delicate cleaning twice a day along with some antibacterial ointment, cream or moisturizer. Our 100% vegan balm is a popular choice for many people, along with the full recovery soap kit.     Fresh Looking Ink Part of the aftercare process when you’ve gotten a tattoo is committing to reducing fading and keeping the ink looking fresh. There are a couple of things you can prioritize to make this happen. Firstly, do what you can to keep it out of direct sunlight where possible. Try not to scratch the tattoo either. Never soak a tattoo until it is fully healed, and stay away from alcohol or recreational substances during the healing process. Do what you can to avoid situations that might wear on your tattoo and hinder the healing process, perhaps even ruining the design in the long run too.  Expert Advice When You Need It The BodyJ4You team consists of experts that have been refining their craft in the body and fashion jewelry space for over 16 years. Aside from offering a range of options for creative expression, we are also committed to helping to make the recovery process after getting a tattoo or going through ear gauging as simple and painless as possible. Products are quality checked and created by following strict safety regulations. We’re happy to offer any advice on the process, the best options for your needs, as well as celebrating your new body ink or piercing with you. 

Learn more