

What if the secret to a perfectly healed belly button piercing isn't about how much you scrub it, but how precisely you protect it? Many collectors believe that aggressive cleaning is the only path to safety, yet the most successful journeys rely on a philosophy of nurtured non-interference. You've likely felt the anxiety of conflicting online advice or the sharp pinch of a waistband against fresh jewelry; it's a physical vulnerability that demands a steady, expert hand.
Precision. Purity. Protection. Establishing a consistent navel piercing aftercare routine is the definitive way to transform that uncertainty into confidence. We'll master the exact morning and night steps required to navigate the 6 to 12-month healing window safely. This guide provides a foolproof schedule, identifies the sterile saline products you can trust, and details the lifestyle adjustments necessary to prevent scarring or migration. You'll learn to clean with purpose, protect with care, and heal with elegance.
Key Takeaways
- Recognize the biological complexity of the fistula, the delicate skin tunnel that demands 6 to 12 months of consistent, patient care.
- Implement a structured navel piercing aftercare routine that utilizes a "cleanse and protect" rhythm to maintain the integrity of your new aesthetic.
- Replace unpredictable home remedies with sterile, pressurized saline to ensure a safe, dermatologically sound environment for healing.
- Shield your piercing from the damaging effects of friction by making strategic adjustments to your wardrobe and daily movements.
- Identify common complications early and discover how specialized treatment oils can support the skin’s natural recovery process.
Understanding Navel Piercing Healing: Why the Routine Matters
A navel piercing is a bold statement of self-expression. It's also a complex biological commitment. Unlike piercings that pass through thin ear cartilage, the navel is considered "surface-adjacent." This means the jewelry rests within a fold of skin that's constantly subject to tension, compression, and movement. Every time you sit, twist, or breathe, your midsection puts pressure on the healing site. This mechanical stress is why a disciplined navel piercing aftercare routine is not just a suggestion; it's a requirement for tissue stability. You aren't just cleaning a wound. You're managing an environment.
The primary goal of healing is the formation of a fistula. This is a delicate tunnel of skin that grows from the inside out to protect your body from the jewelry. Because the navel area has limited blood flow compared to other regions, this Navel piercing healing process typically spans 6 to 12 months. We rely on the Rule of Three to guide this journey: Purity, Protection, and Patience. You must use pure ingredients, protect the site from friction, and have the patience to allow biology to take its course. Without this structure, the risk of rejection or migration increases significantly.
The Biological Timeline: A Three-Phase Journey
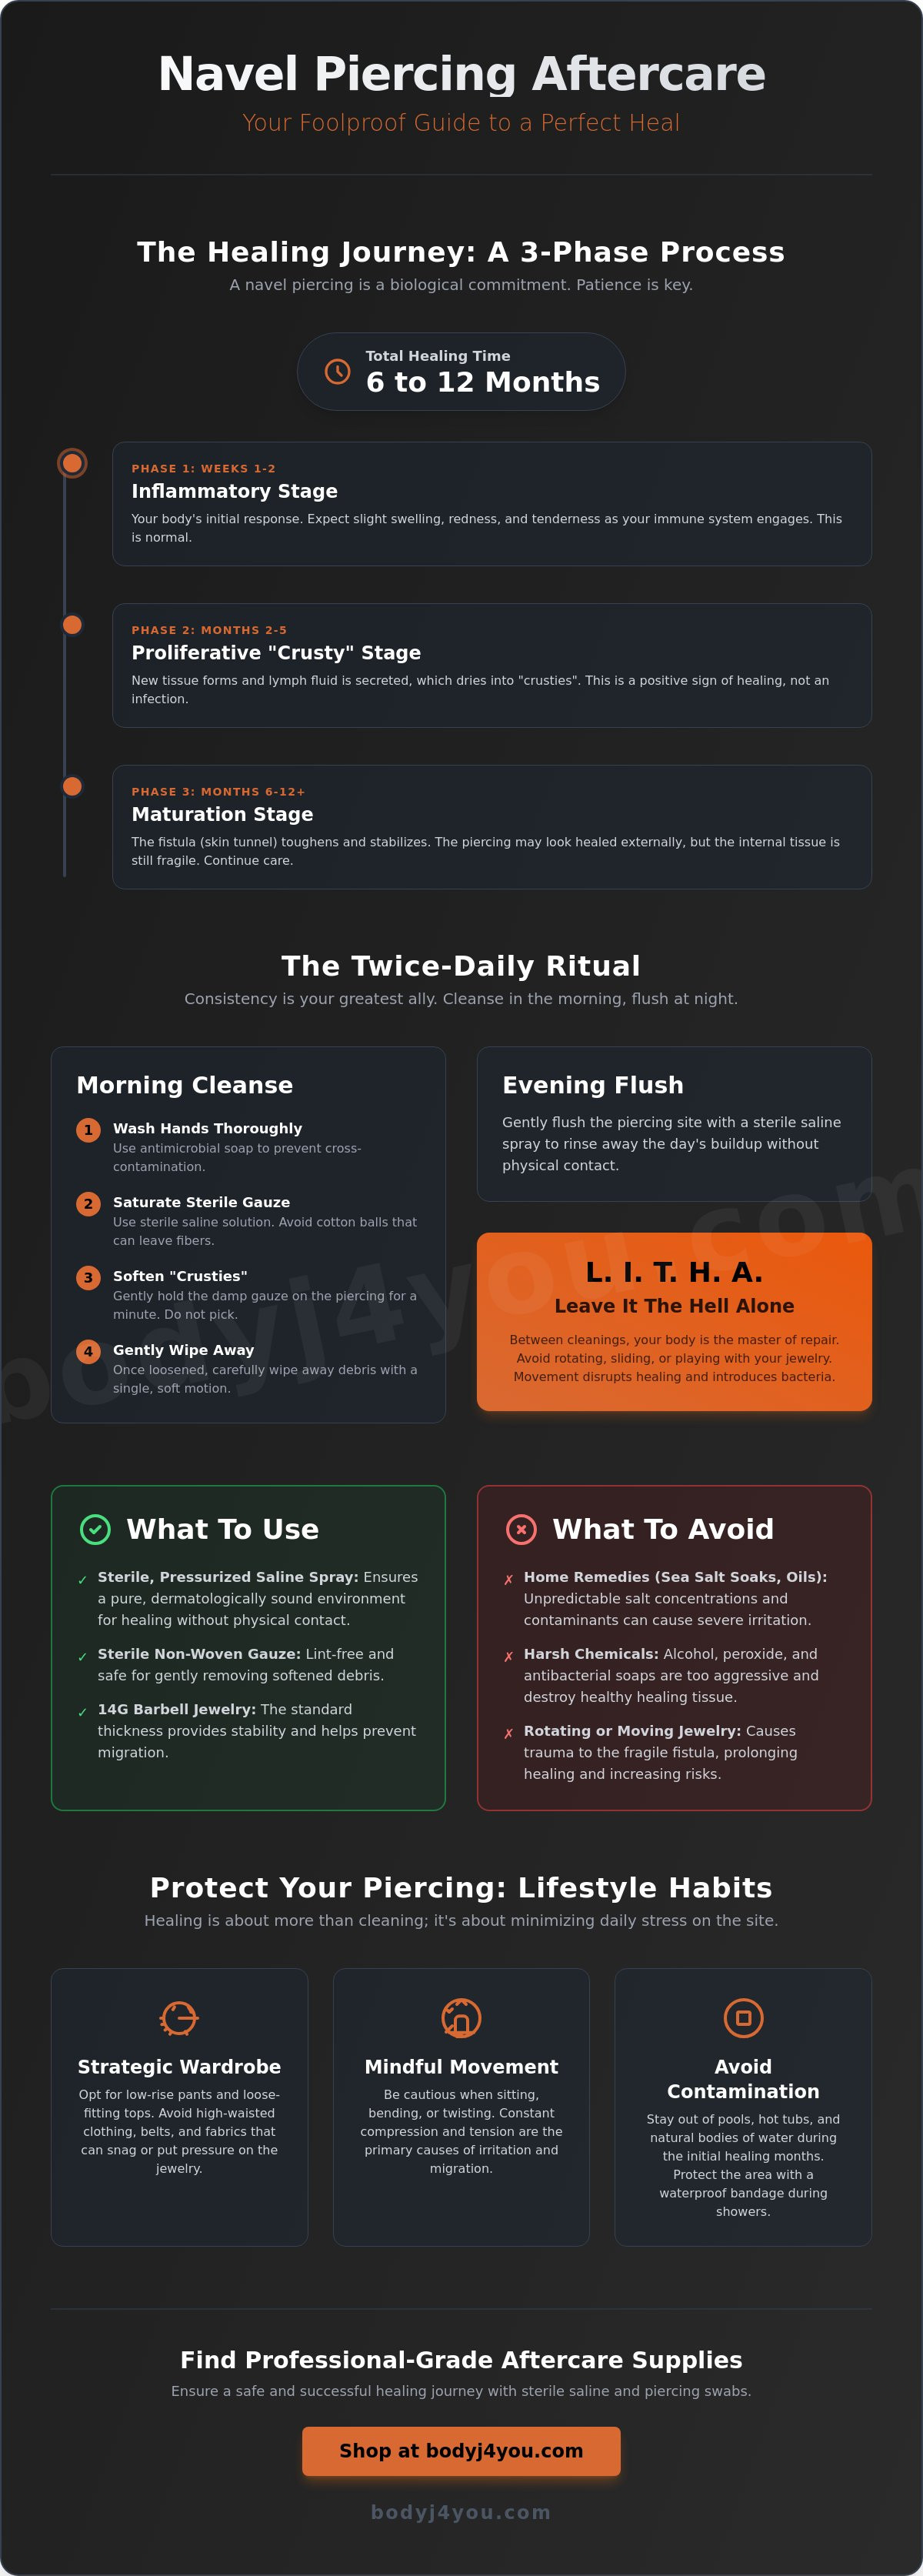
Healing happens in distinct stages. During Phase 1, the Inflammatory Stage (Weeks 1-2), your body reacts to the jewelry. Slight swelling and tenderness are normal signs of the immune system engaging. Phase 2, the Proliferative Stage (Months 2-5), is often called the "crusty" phase. Your body builds new tissue and secretes lymph fluid, which hardens around the bar. Finally, Phase 3, the Maturation Stage (Months 6+), is when the fistula toughens and becomes truly stable. Don't be fooled by a lack of pain in month three; the internal tissue is still fragile and requires continued care.
Anatomy and The Shelf: Foundation of Success
Your unique anatomy dictates the success of your navel piercing aftercare routine. A "shelf" of skin must be present to support the jewelry properly. For those with deep-set navels or "outies," the angle of cleaning changes to ensure saline reaches the entire fistula. We recommend a 14G barbell for standard placements. This specific thickness provides the necessary surface area to prevent the jewelry from migrating through the skin. While we don't provide the piercing service itself, we advocate for professional placement as the essential starting point for your long-term wellness journey.
The Daily Navel Piercing Aftercare Routine: Morning and Evening Steps
Stability requires structure. A successful navel piercing aftercare routine follows a predictable, rhythmic cycle designed to support your body's natural recovery. It's a twice-daily discipline: cleanse in the morning and flush at night. Between these sessions, the most effective strategy is the "LITHA" philosophy, or Leave It The Hell Alone. Your body is a master of repair; it doesn't need constant interference. Avoid the temptation to rotate, slide, or play with your jewelry. Moving the barbell disrupts the fragile tissue of the fistula and can introduce bacteria deep into the wound.
Consistency is your greatest ally. By following the Association of Professional Piercers aftercare guidelines, you ensure that the environment around your piercing remains clinical and calm. Using a specialized sterile saline spray for piercings is essential for maintaining the proper pH balance of the skin. This prevents the site from becoming too dry or overly moist, both of which can lead to irritation or migration. For a reliable healing experience, you can find professional-grade supplies at BodyJ4You.
The Morning Cleanse: Removing "Crusties" Safely
When you wake up, you'll likely notice "crusties" around the jewelry. This is lymph, a normal byproduct of the healing process. Removing it safely is the first pillar of your morning ritual. Start by washing your hands thoroughly with antimicrobial soap to eliminate any risk of cross-contamination. Saturate a sterile gauze pad or one of our Piercing Cleaning Swabs with saline solution. Gently hold the damp swab against the debris to soften it. Once the lymph has loosened, wipe it away with a single, soft motion. Never pick at dry crusts with your fingernails, as this causes trauma to the skin.
The Evening Rinse: Flushing the Piercing Site
Your evening routine focuses on flushing out the day's accumulation of sweat and environmental pollutants. Begin in the shower by letting warm water run over the navel for several minutes. This natural irrigation helps loosen any remaining debris without manual contact. After your shower, apply a fine-mist Saline Piercing Aftercare Spray to both the top and bottom exit holes. This ensures the entire channel is saturated and clean. Finally, pat the area dry using a fresh, disposable paper towel. Avoid using cloth towels, which can harbor dormant bacteria or snag on the jewelry. This simple, three-step rinse protects the integrity of your piercing while you sleep.
Saline vs. Home Remedies: Choosing the Right Cleaning Solution
The chemistry of your navel piercing aftercare routine determines the speed and quality of your recovery. Purity. Precision. Performance. These are the three pillars of a successful healing solution. While digital forums are often filled with "DIY" recipes, your body requires clinical standards to rebuild the fistula safely. Choosing the wrong solution doesn't just delay healing; it can actively damage the delicate new cells trying to form a protective bridge around your jewelry.
Isotonic 0.9% sodium chloride is the gold standard for wound care. This specific concentration mimics your body’s natural internal chemistry, allowing for cleaning without irritation. In contrast, "kitchen salt" is unpredictable. Most table salts contain iodine, anti-caking agents, or trace minerals that can cause a chemical burn on raw tissue. Our Saline Piercing Aftercare Spray acts as a "Wise Guardian" for your skin. The pressurized delivery system provides a sterile, fine mist that flushes out bacteria with clinical precision, ensuring that no outside contaminants enter the wound during the application.
The Myth of the Sea Salt Soak
For years, the "sea salt soak" was a staple of piercing culture. However, modern dermatological standards have moved away from this practice for two critical reasons. First, the vessel you use—whether a shot glass or a coffee mug—is rarely sterile. Submerging your navel in a cup can actually introduce new pathogens into the site. Second, achieving the correct salt-to-water ratio at home is nearly impossible. Too much salt creates a hypertonic environment that dehydrates and "burns" emerging skin cells. Sterile saline is the only industry-standard solution that guarantees safety and consistency every time you use it.
Chemicals to Avoid at All Costs
Protecting your piercing means knowing what to keep away from it. Many common household antiseptics are far too aggressive for a navel piercing aftercare routine. Hydrogen peroxide is a cellular "nuke" that destroys healthy white blood cells along with bacteria, effectively stalling your progress. Similarly, ointments like Neosporin or Bactine are designed for shallow scrapes, not deep piercing channels. These thick substances suffocate the site by blocking oxygen, which is essential for tissue regeneration. Finally, avoid fragrant body washes and soaps. These products are the leading cause of contact dermatitis in new piercings, leading to unnecessary redness, itching, and swelling.
Beyond Cleaning: Lifestyle Habits for a Healthy Navel Piercing
A successful navel piercing aftercare routine extends far beyond the bathroom mirror. While saline is your primary tool for purity, your daily habits provide the essential protection required for tissue stability. Friction is the silent enemy of a healing fistula. Constant pressure from high-waisted leggings or tight waistbands can lead to "migration," where the body physically pushes the jewelry toward the surface. This isn't just an aesthetic setback; it's a sign of cellular stress. To maintain the integrity of your piercing, you must adapt your lifestyle to accommodate your body's recovery.
Practical protection requires foresight. When driving, the "Seatbelt Shield" is a simple but effective technique: position the lap belt slightly below the navel or use a small, soft cushion to prevent the strap from snagging the jewelry. Sleep also demands strategy. If you're a stomach sleeper, try using a "travel pillow" or a donut-shaped cushion placed around the navel to create a pressure-free zone. At the gym, remember that sweat itself is manageable, but core-heavy exercises and waist-training must wait. Excessive twisting or crunching movements can cause micro-tears in the new skin tunnel, inviting irritation bumps.
The 2026 Wardrobe Guide for Healing Piercings
Your clothing choices should prioritize airflow and low friction. For the first 12 weeks, switch to low-rise cuts or ultra-soft waistbands that sit well below the piercing site. If you participate in contact sports, the "Hard-Shell" trick is a professional secret: tape a ventilated plastic eye patch over the area to create a protective dome that allows the skin to breathe while preventing impact. Finally, resist the urge to wear "dangle" jewelry too early. The added weight and movement can tear the fragile fistula; wait at least 6 months until the site has matured. You can explore a curated collection of stable, high-quality jewelry at BodyJ4You to ensure your style never compromises your safety.
Swimming and Submerging: The 8-Week Rule
Patience is the final pillar of health. For the first 8 weeks, avoid submerging your piercing in bodies of water like hot tubs, lakes, or public pools. These environments are "bacterial soups" that pose a high risk of infection for an open wound. Don't rely on waterproof bandages; they frequently fail and trap moisture against the skin, creating a breeding ground for pathogens. If accidental submersion occurs, don't panic. Immediately rinse the site with fresh water and follow up with a thorough application of your Saline Piercing Aftercare Spray to restore a sterile environment.
Troubleshooting Common Issues: Irritation, Bumps, and Migration
Even a meticulous navel piercing aftercare routine can encounter biological hurdles. Your body is dynamic; it reacts to stress, climate, and accidental trauma. Identifying a complication early is the difference between a minor setback and a permanent scar. When a small protrusion appears near the jewelry, don't panic. Most "piercing bumps" are simply localized irritation or granulomas rather than the permanent keloids many fear. By staying observant and disciplined, you can maintain the aesthetic refinement of your piercing through every stage of the healing journey. Observe. Assess. Act.
Proactive care is the hallmark of a wise collector. If you notice a persistent growth, take the time to learn how to get rid of piercing bump symptoms before they escalate. Your journey toward self-expression deserves a foundation of safety and expert knowledge. By combining professional-grade products with a watchful eye, you ensure that your navel piercing remains a source of pride for years to come. Beauty. Biology. Balance.
Managing the Dreaded "Belly Bump"
Irritation bumps often signal a mechanical or chemical conflict. First, examine your jewelry. If the barbell is too short, it may be compressing the tissue and trapping lymph. Similarly, transitioning to high-quality titanium or surgical steel can resolve sensitivities to mystery metals. For active swelling, we recommend the "Warm Compress" method. Soak a piece of sterile gauze in your Saline Piercing Aftercare Spray, warm it slightly, and hold it against the site for five minutes. This increases blood flow and encourages drainage. Once the initial wound has successfully closed, you can integrate our Piercing Bump Treatment Oil or Jojoba oil to soothe mature irritation and support skin elasticity.
- Check for jewelry length to ensure there is room for swelling.
- Use warm saline compresses to reduce localized inflammation.
- Apply specialized oils only after the fistula has stabilized and the wound is closed.
Signs of Rejection vs. Migration
It's vital to distinguish between a piercing that is "settling" and one that your body is actively fighting. Migration is common; the jewelry moves slightly to find a more comfortable position within your anatomy, often due to daily friction. Rejection, however, is a serious red flag. During rejection, the body treats the jewelry as a foreign object and pushes it toward the surface. Look for thinning skin between the exit holes or a visible increase in the length of the barbell bar. If the distance between the top and bottom beads begins to shrink, follow the "Consultation Rule" and see your professional piercer immediately. Early intervention is the only way to prevent significant scarring. Consistency in your navel piercing aftercare routine is your best defense against these complications.
Secure Your Journey to Self-Expression
Purity. Precision. Protection. These three principles are the foundation of a successful healing journey. By mastering the structured morning and night ritual, you transform a period of physical vulnerability into a confident path toward aesthetic refinement. You've learned to distinguish between normal biological stages and the red flags of rejection. You now understand that clinical-grade solutions far outweigh the risks of unpredictable home remedies. Implementing a consistent navel piercing aftercare routine is the ultimate act of care for your new body art.
Trust in a brand that bridges the gap between beauty and biology. With over 20 years of dedicated body modification expertise, our US-manufactured skincare ensures strict quality control and total transparency. Our formula utilizes clinical-grade 0.9% Sodium Chloride to support your body's natural recovery without the use of harsh additives or irritants. Shop the BodyJ4You Sterile Saline Aftercare Spray for a flawless heal and give your skin the specialized support it deserves. Your patience today ensures a lifetime of beautiful, stable self-expression. Heal with confidence.
Frequently Asked Questions
How long does a navel piercing take to fully heal?
A navel piercing typically takes 6 to 12 months to reach full maturation. While the surface may appear closed within a few weeks, the internal fistula requires a full year to toughen and stabilize against the jewelry. Maintaining a disciplined navel piercing aftercare routine throughout this entire window is essential for long-term health and stability.
Can I use rubbing alcohol to clean my belly button piercing?
You should never use rubbing alcohol or hydrogen peroxide on a healing piercing. These substances are non-selective; they destroy the beneficial skin cells required for tissue regeneration along with bacteria. This cellular damage leads to prolonged healing times and increased irritation. Stick to sterile saline to maintain the purity and integrity of the site.
When can I change my navel jewelry for the first time?
We recommend waiting at least 6 months before attempting your first jewelry change. Ideally, you should wait until the 12-month mark to ensure the skin tunnel is fully established and matured. Changing jewelry too early can cause micro-tears in the fragile fistula, which often leads to irritation bumps, migration, or even rejection.
Is it normal for my new navel piercing to bleed or leak clear fluid?
Minor bleeding and the secretion of clear or pale yellow fluid are normal during the initial stages of healing. This fluid is lymph, a natural byproduct of your body’s immune response and tissue repair process. If the discharge becomes thick, opaque, green, or develops a foul odor, it's a sign that you should consult a professional.
What should I do if my piercing feels hot or looks very red?
Heat, persistent redness, and throbbing pain are clinical signs of potential infection. If you experience these symptoms, don't remove the jewelry, as this can trap the infection inside the fistula. Seek advice from your piercer or a healthcare professional immediately to protect your well-being and ensure the infection is managed safely.
Can I exercise or go to the gym after getting a navel piercing?
You can return to light exercise almost immediately, but you must avoid core-heavy movements like crunches, twists, or heavy lifting for several weeks. High-intensity activity increases sweat and mechanical friction, which can stress the wound. Always rinse the site with sterile saline immediately after your workout to remove sweat and environmental pollutants.
Why is my belly button piercing crusty every morning?
Morning "crusties" are simply dried lymph fluid that your body secretes during the night to support the healing process. This is a positive sign that your immune system is actively building new tissue. Use a saturated cleaning swab to soften and gently remove this debris without picking at the skin or rotating the jewelry.
Can I use a band-aid to cover my piercing while I sleep?
Avoid using adhesive bandages or band-aids to cover your piercing while you sleep. These materials block essential oxygen flow and trap moisture against the skin, creating an ideal breeding ground for bacteria. Instead, wear loose, breathable cotton clothing to protect the site from snags while allowing the tissue to breathe and recover naturally.


